Build Customer Service (.NET, Minimal API, and PostgreSQL)
")
Hello everyone, I hope you’re all having a great weekend.
In the next part of the Microservices practical series, we will be building the product service. To understand this blog, you must first read parts 1 and 2.
Today, we will continue with part 3, where we will delve into the practical aspect of building the Product Service.
In this section, we will introduce and utilize PostgreSQL and Minimal API. I hope to engage in some fruitful discussions with you all. Without further ado, let’s get started.
1. Introducing PostgreSQL and how to install it
- Overview:
- The first version of PostgreSQL was released in 1994 and was well-received for its many features.
- PostgreSQL is an open-source, freely-licensed database, so developers can easily use it without any cost.
- It is a relational database management system and has web management
- PostgreSQL can also be delivered as a Database as a Service (DBaaS) on many cloud platforms, including Amazon Web Services (AWS), Google Cloud SQL, Microsoft Azure, Heroku, and EnterpriseDB Cloud.
- Main features:
- Support for various data types, including custom data types.
- Trigger, View, Parallel query, Multi-version concurrency control,
- Columns/Rows security.
- ACID-compliant transactions with multi-version concurrency control (MVCC) to ensure data consistency.
- Built-in replication and high availability feature to ensure data reliability.
- Ability to handle large amounts of data and scale horizontally through sharding and partitioning.
- Install:
- Download the latest version for the desktop at https://www.pgadmin.org/download/
- Or using docker:
- Opening Portainer and running pgadmin

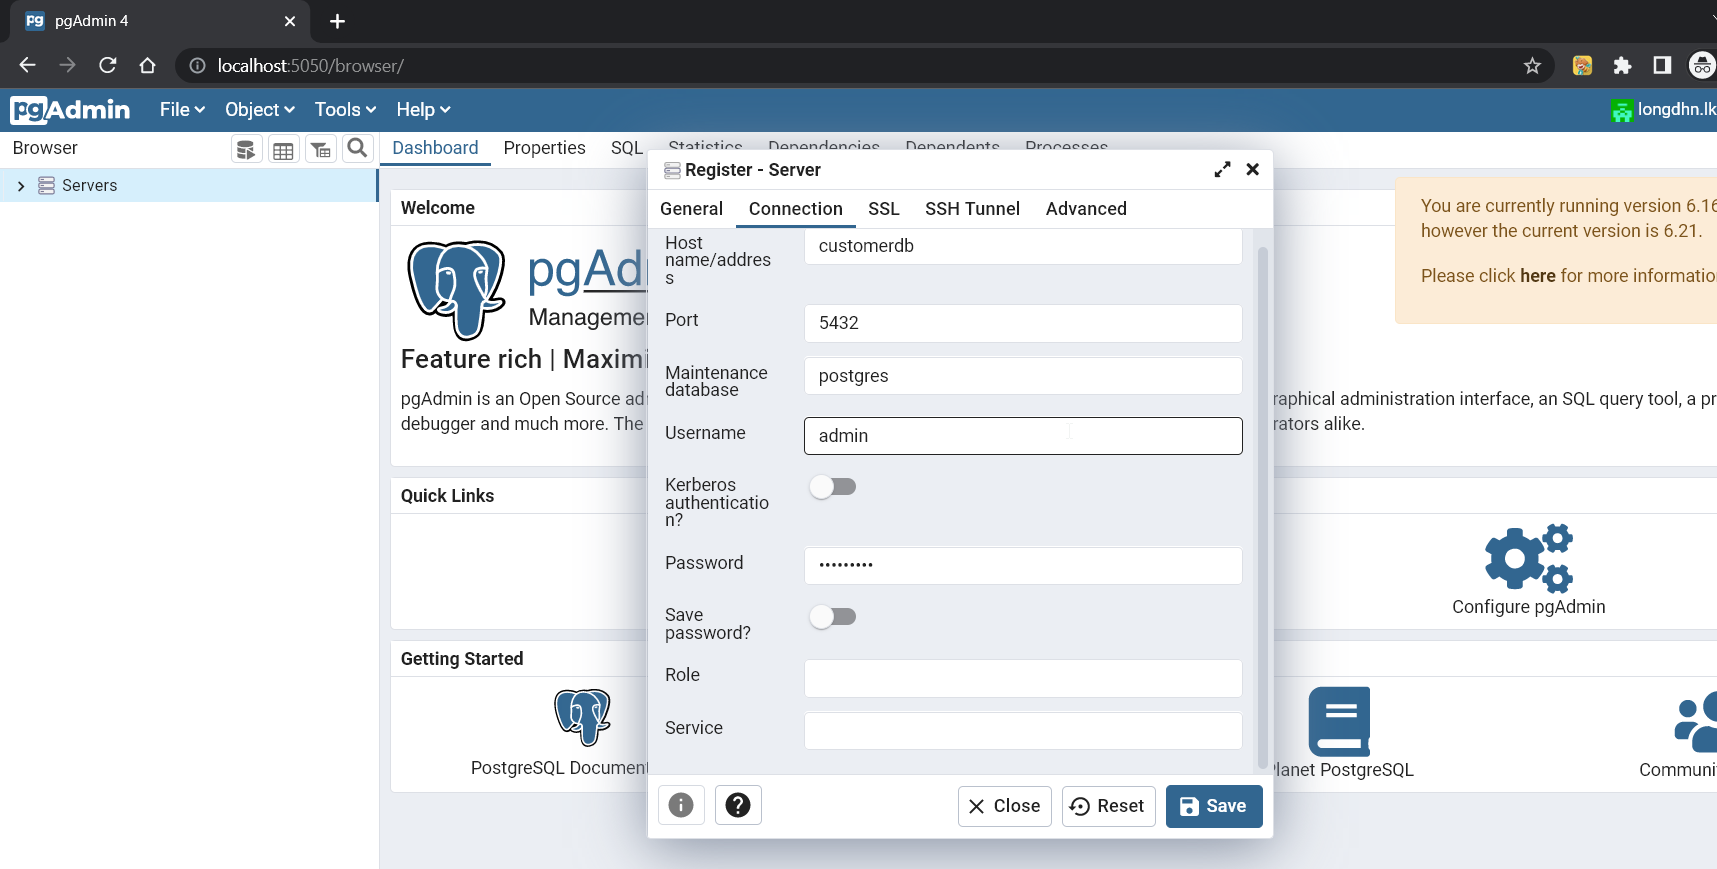
- Accessing http://localhost:5050/login to go to the pgAdmin login page. Enter the username and password that get in the docker-compose.override.yml file to login into the management of administrator.

- After login successfully, we will create a server with the hostname customerdb, username, and password following the docker-compose.override.yml file.
2. Building the project structure for customer service – Configuration, Entities, Seeding data, Repository pattern, Services
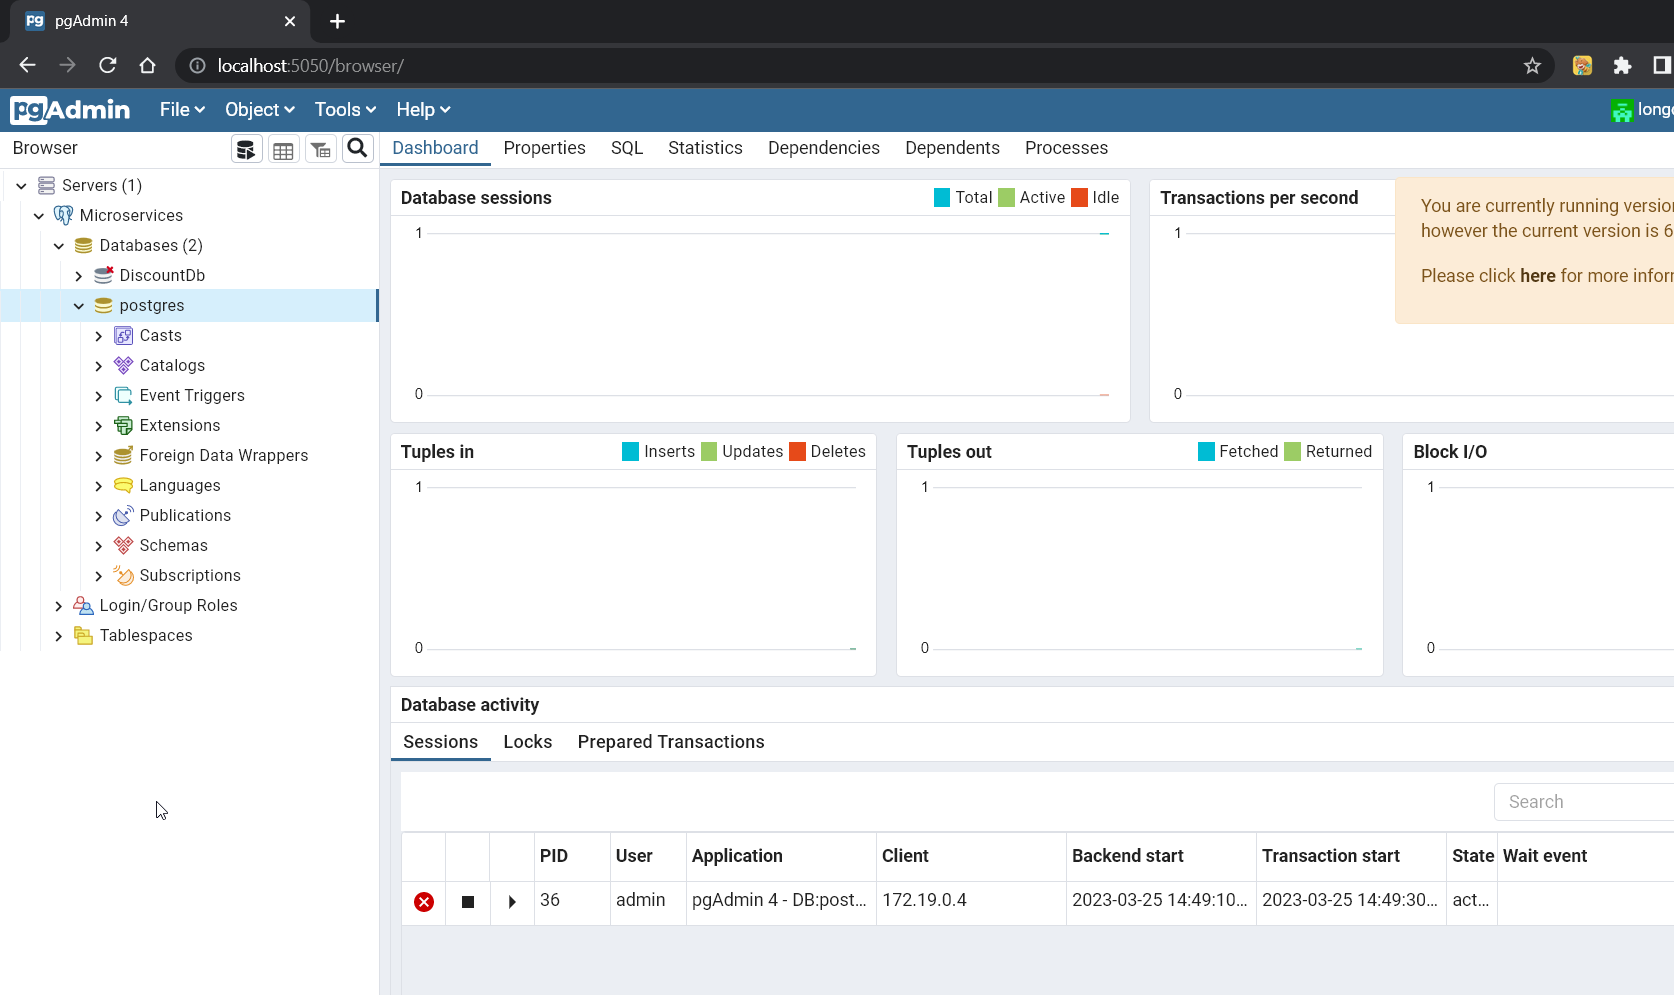
- In this part, we will build CustomerService run on port 5003 and use PostgreSQL for database.
- We will use the new feature of .NET 6 is minimal API as well.
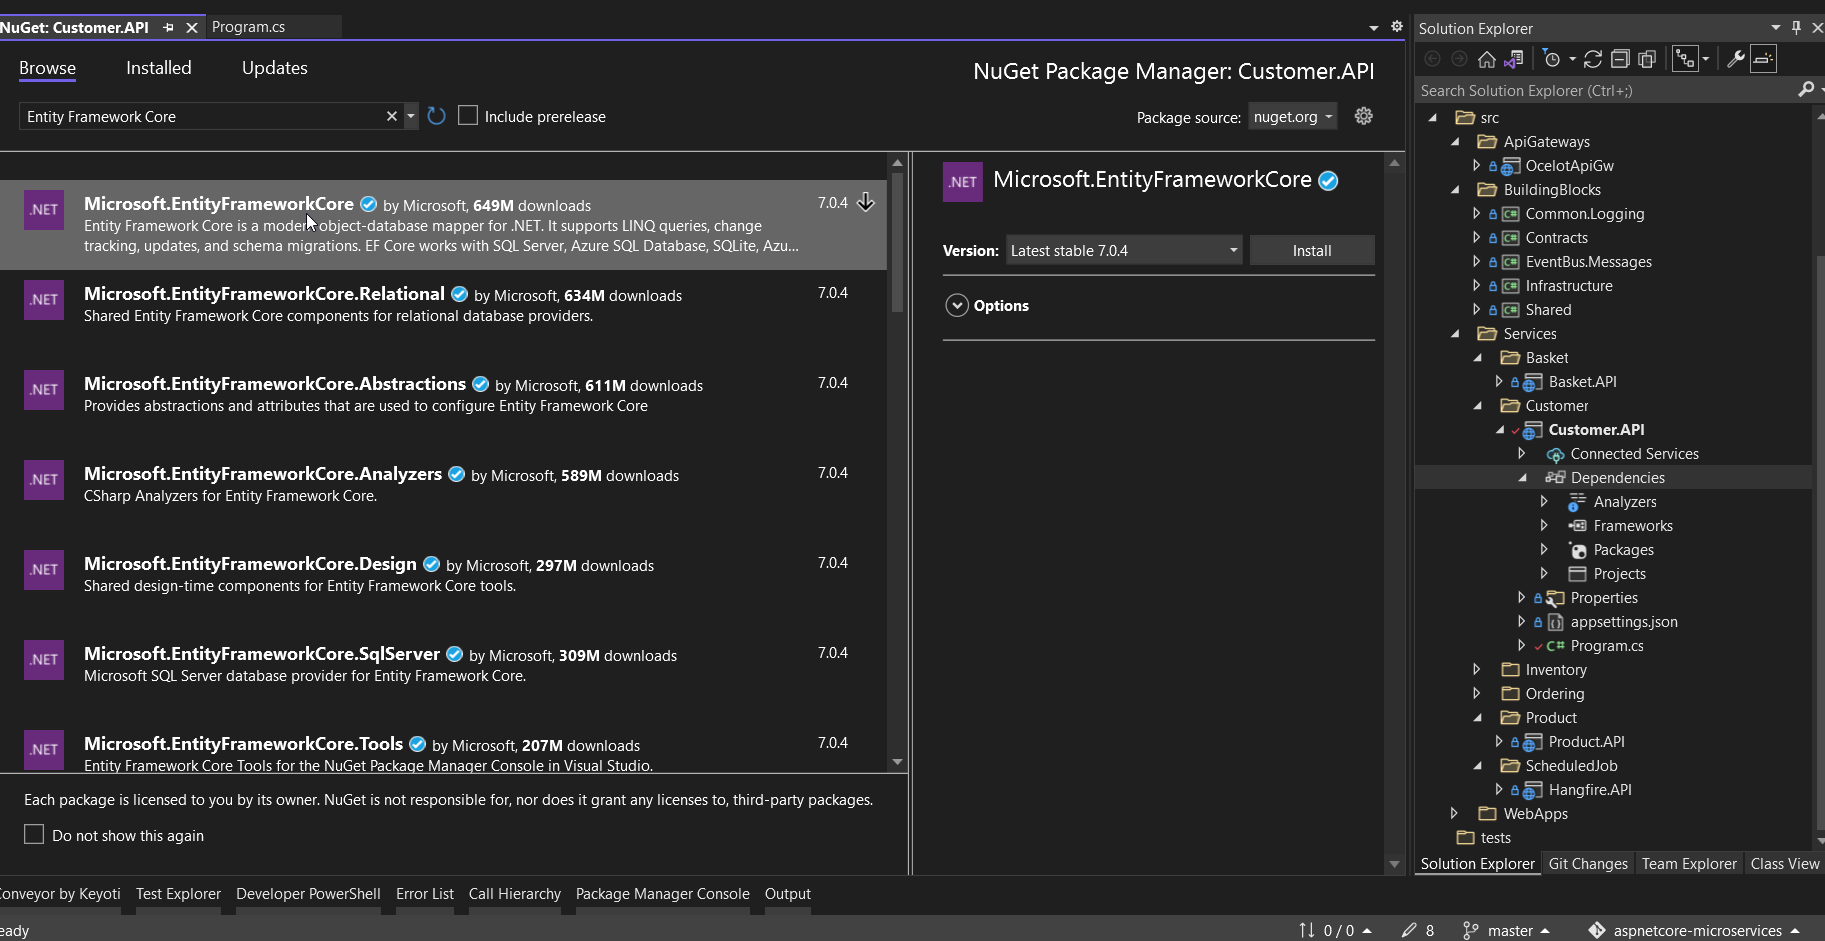
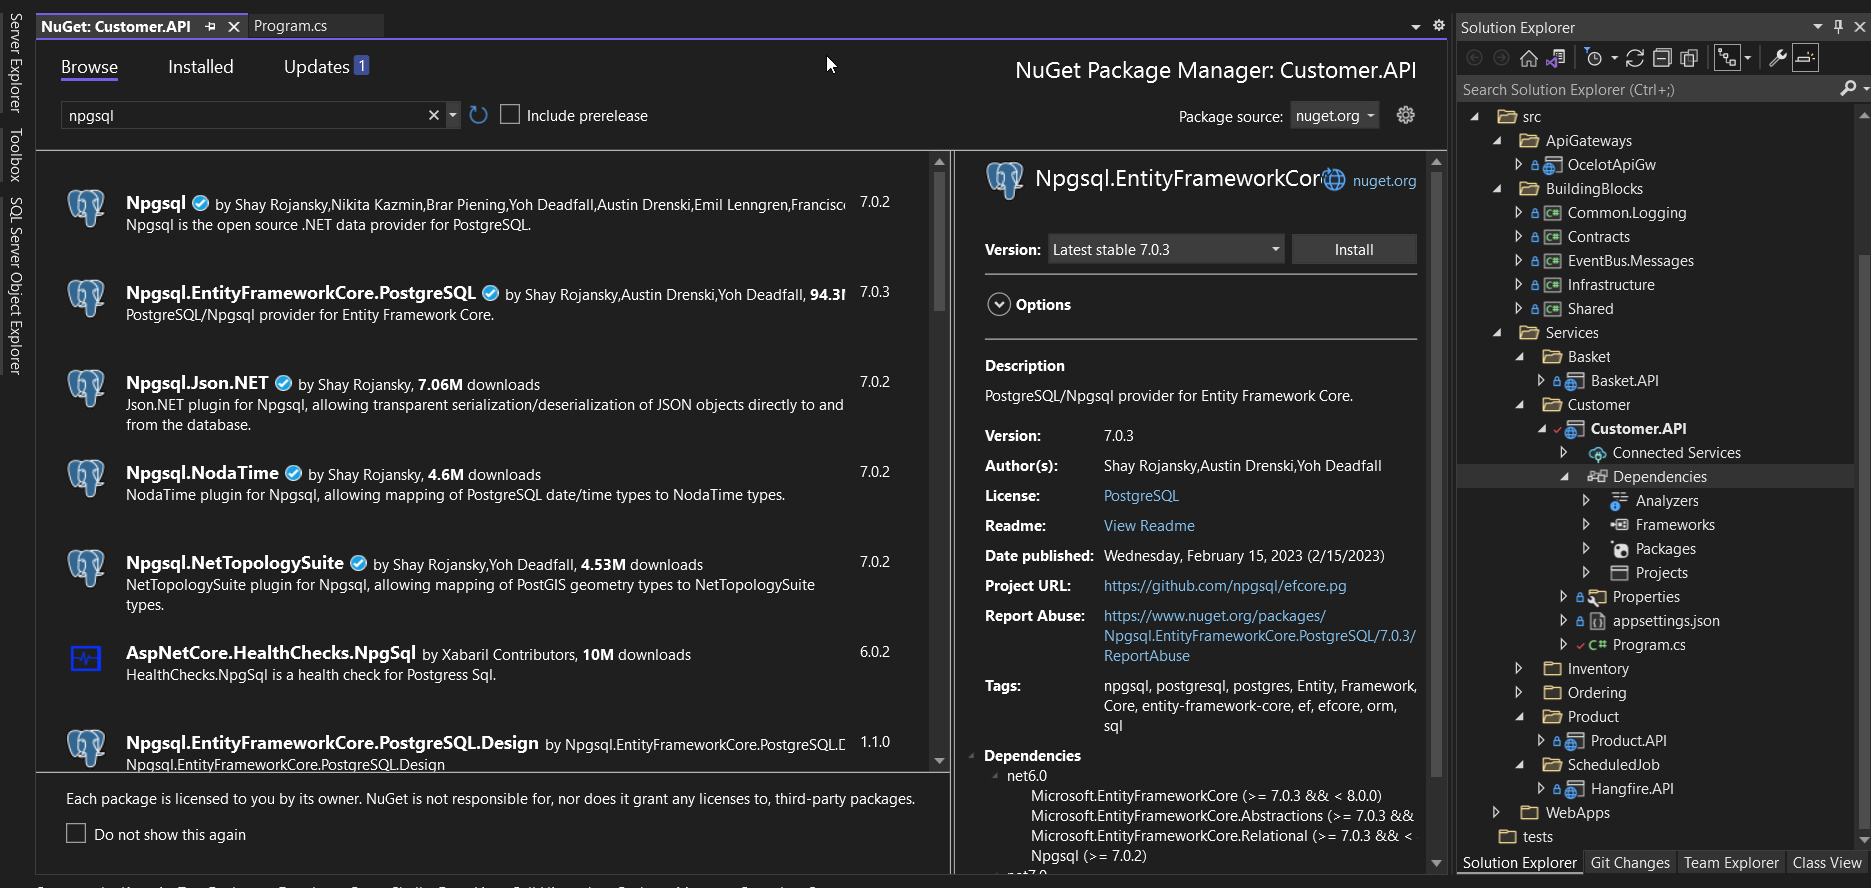
- To work with PostgreSQL, we must install Entity framework core and Npgsql.EntityFrameworkCore package in the NuGet packet.
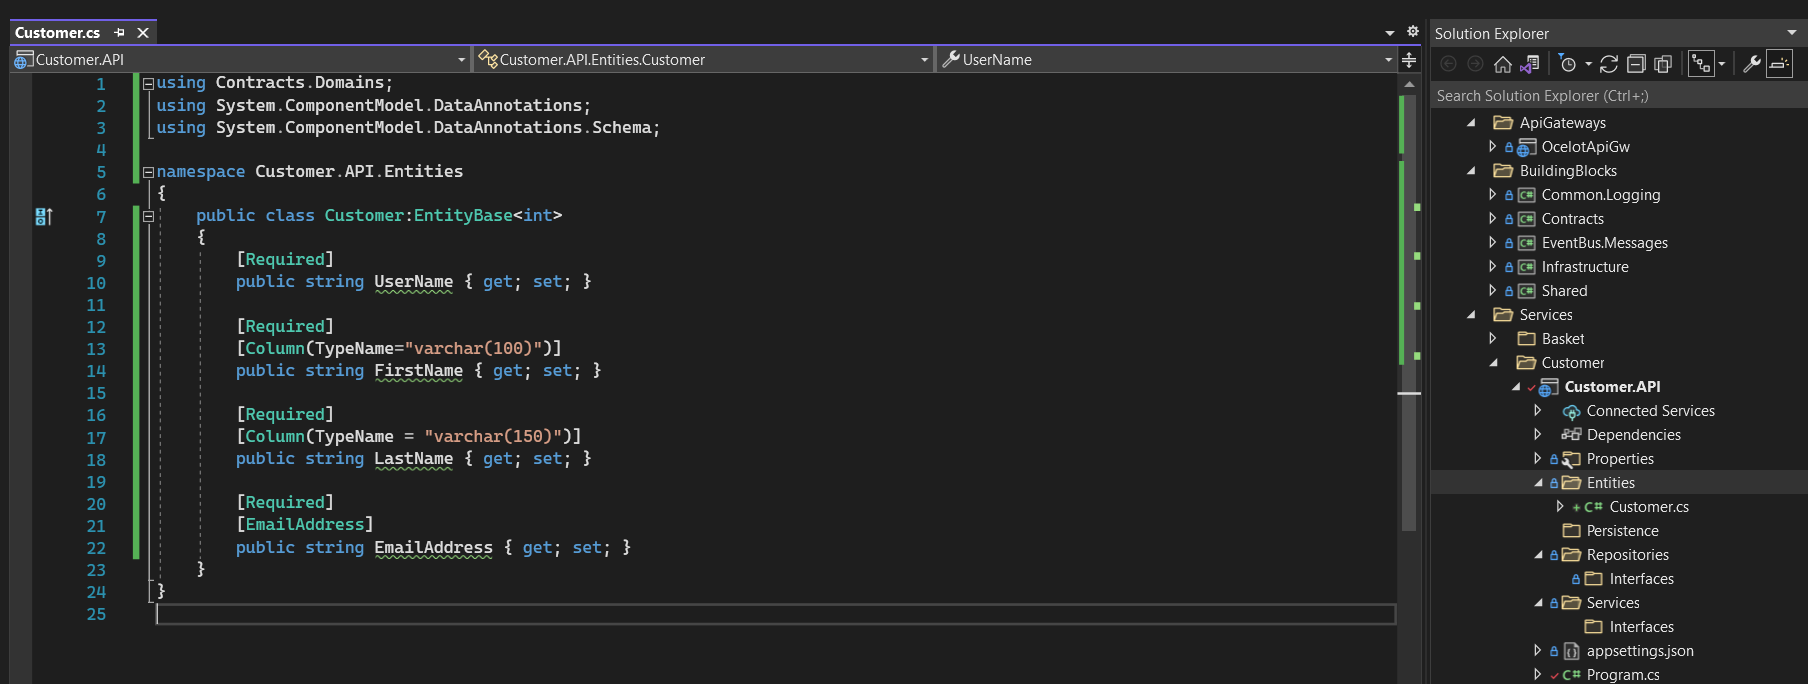
- In Entites folder of Customer.API, we will add Customer.cs class including some basic properties. Later on, as we progress to the subsequent parts, we will add the additional attributes to the class if we need them.
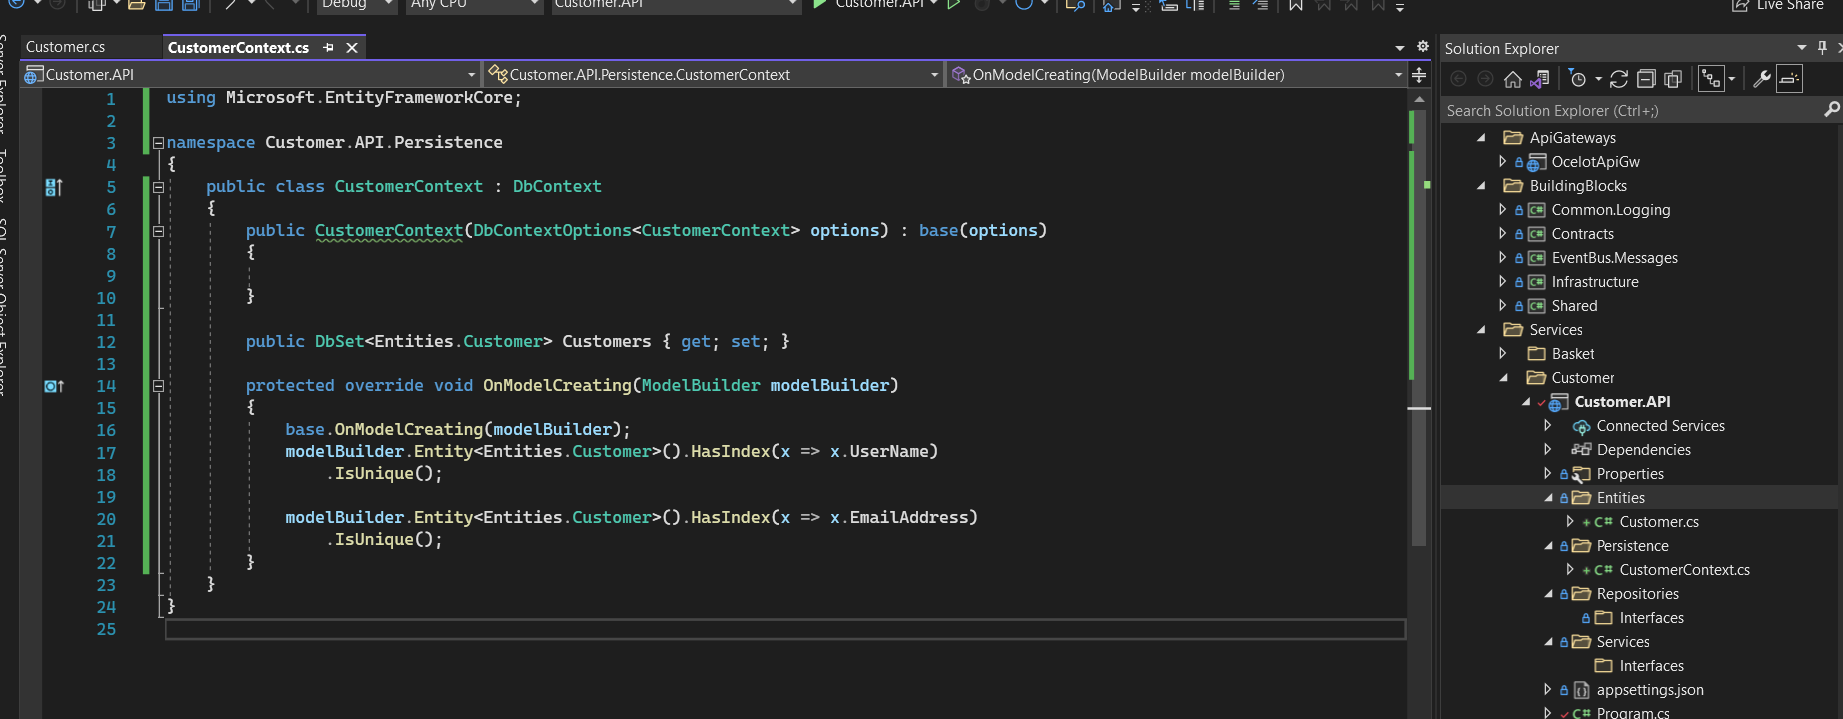
- Add the CustomerContext.cs class to the Persistence folder. In this class, we will override the SaveChangesAsync method to automatically update the following information when there are any data changes: CreatedDate, LastModifiedDate.
- Add the connection string to appsettings.json file. These pieces of information have been configured in the docker-compose file.

“ConnectionStrings”:{“DefaultConnectionString”: “server=localhost;port=5433;Database=CustomerDB;Username=admin;Password=admin1234” },,
- In program.cs add the configuration to connect PostgreSQL

- Add migration and update database for Customer.API. Open the Package Manager Console and run the command line. After running the migration we will have the migration file.
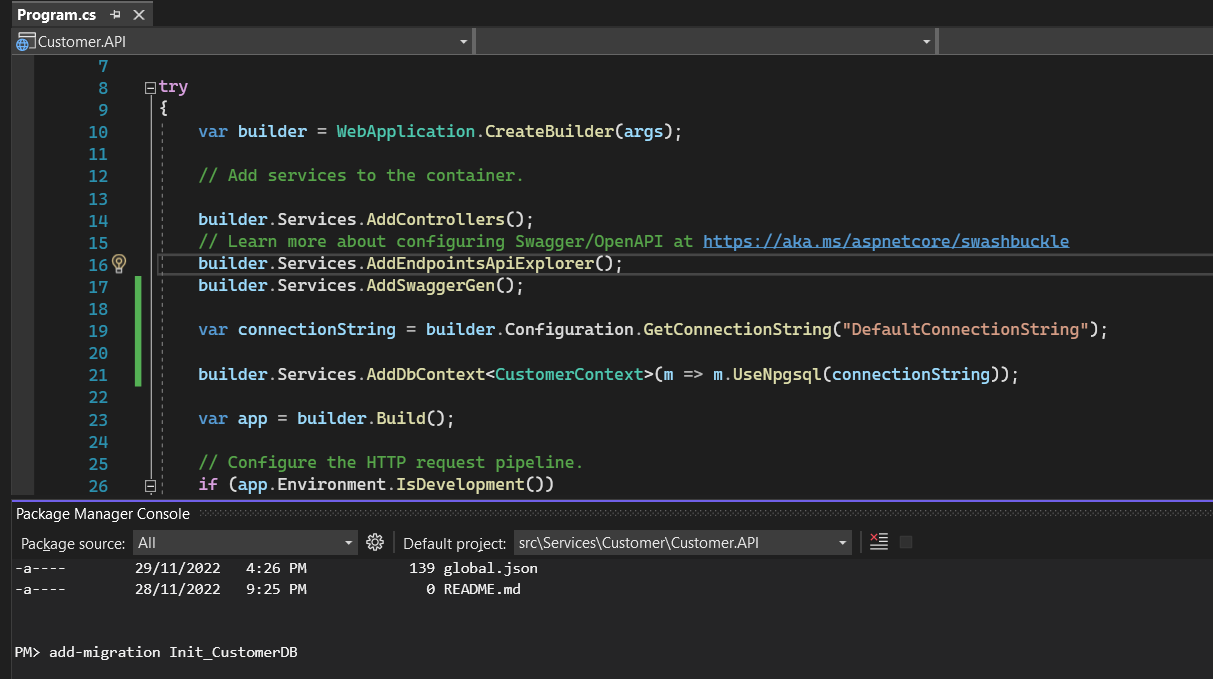
- Run update-database to apply the above migration for the database.

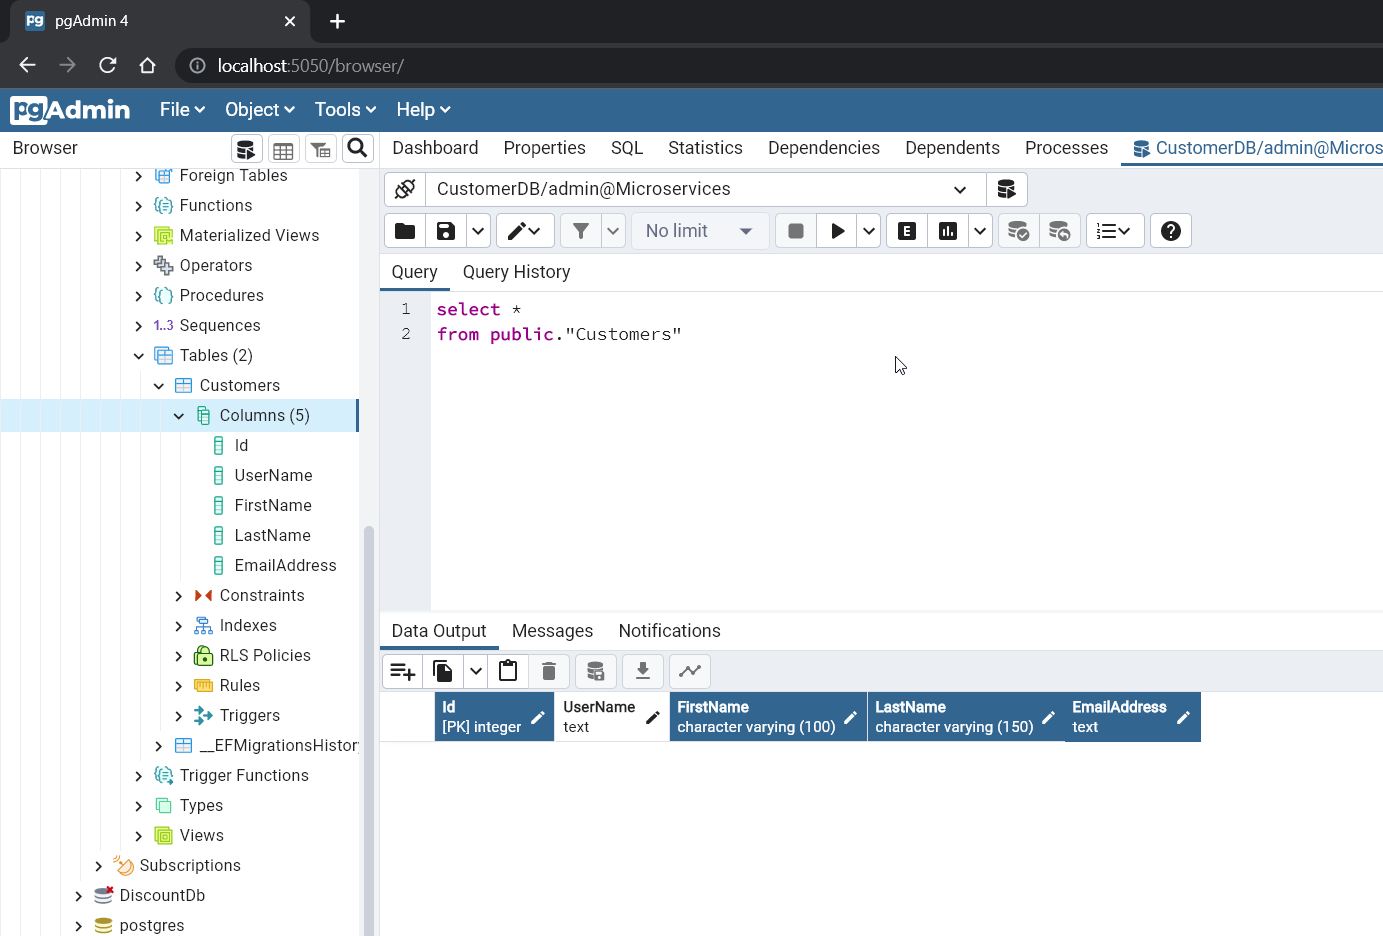
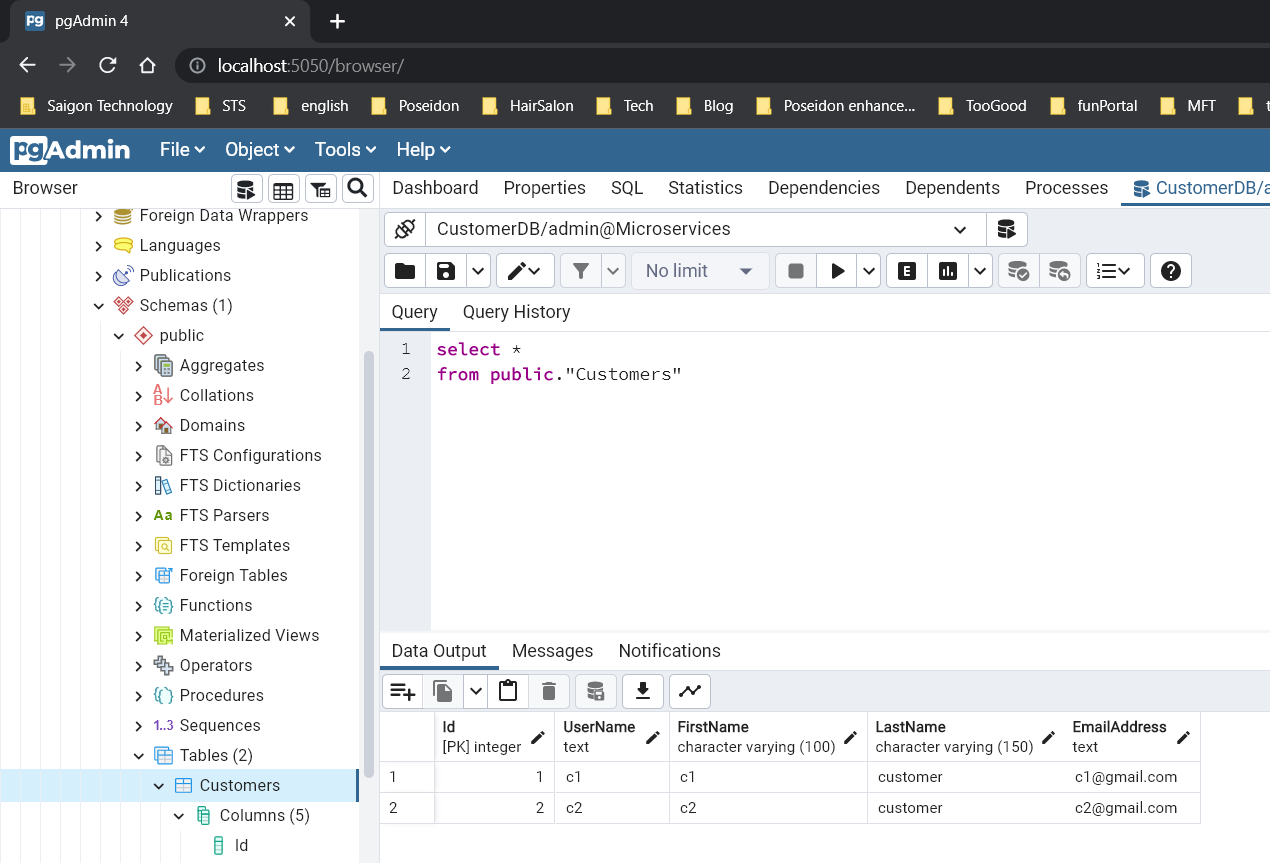
- Go to the database and have a look at the customer table. We created the Customers table successfully with the columns defined in the customer class.
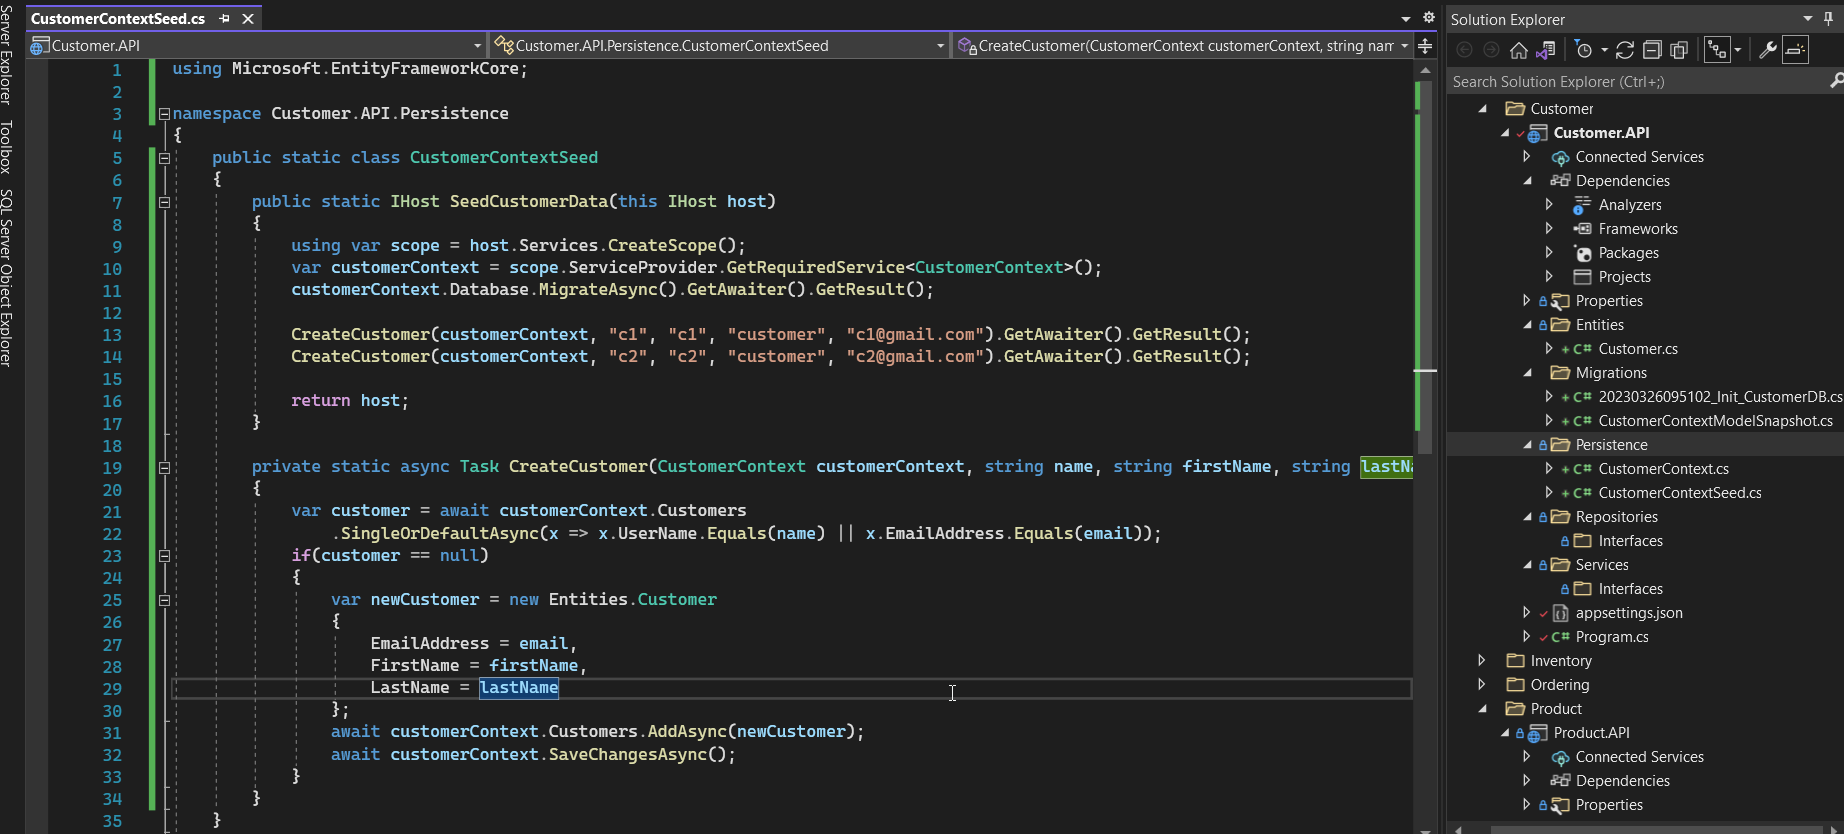
- After that, we add the seeding data for customer service. We create the new class CustomerContextSeed
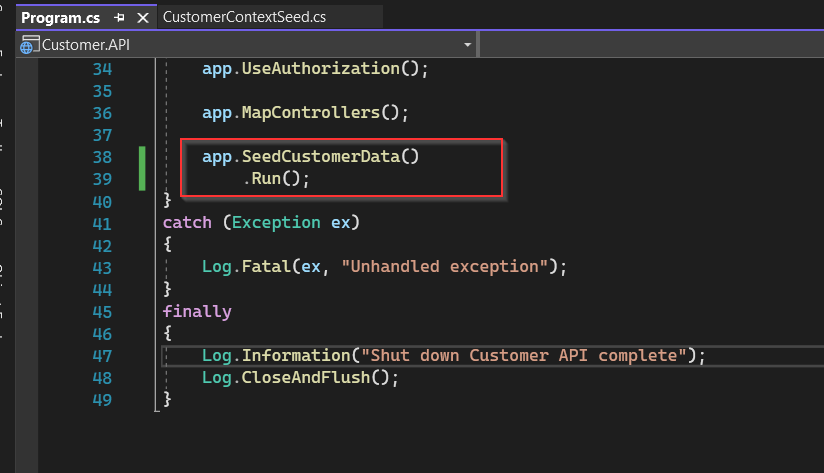
- Call the method SeedCustomerData in the program.cs
- Check the result after seeding data in PostgreSQL.
- Yeah! we finish configuring the migration and seeding data for customer service.
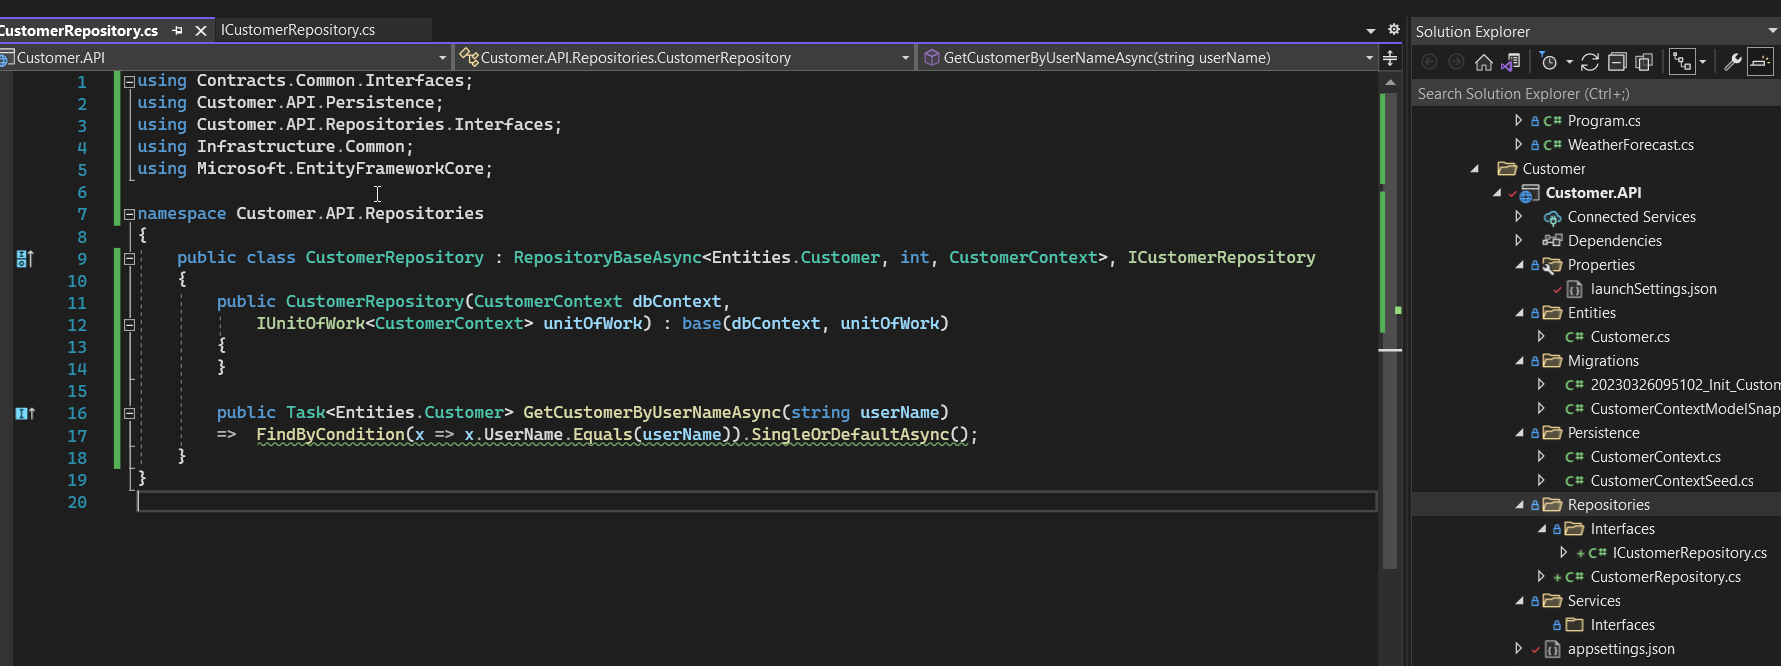
- In Customer.API service, we add the ICustomerRepository interface and CustomerRepository class that inherit the IRepositoryQueryBase interface.

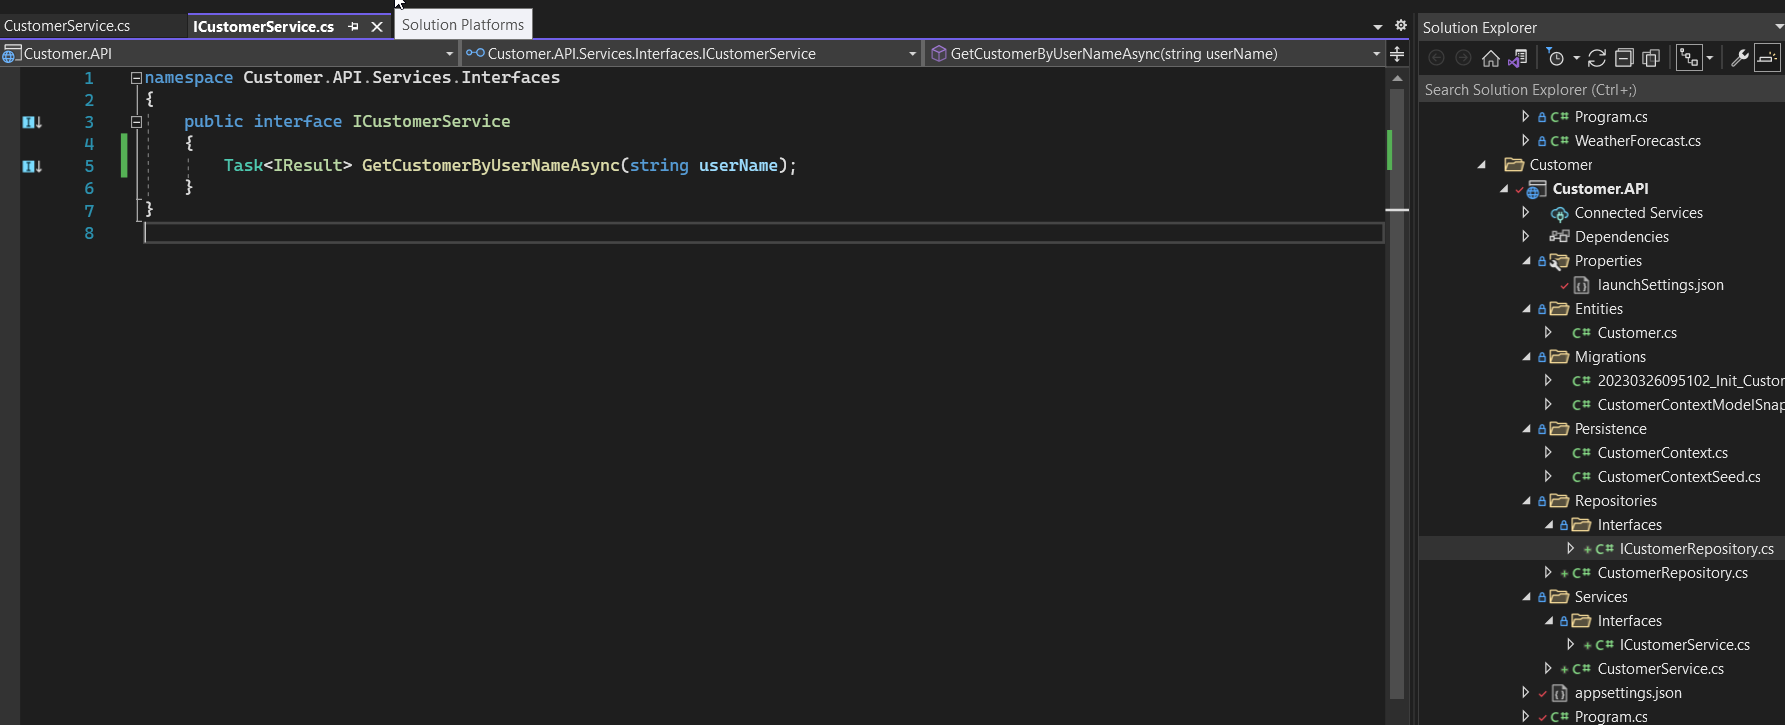
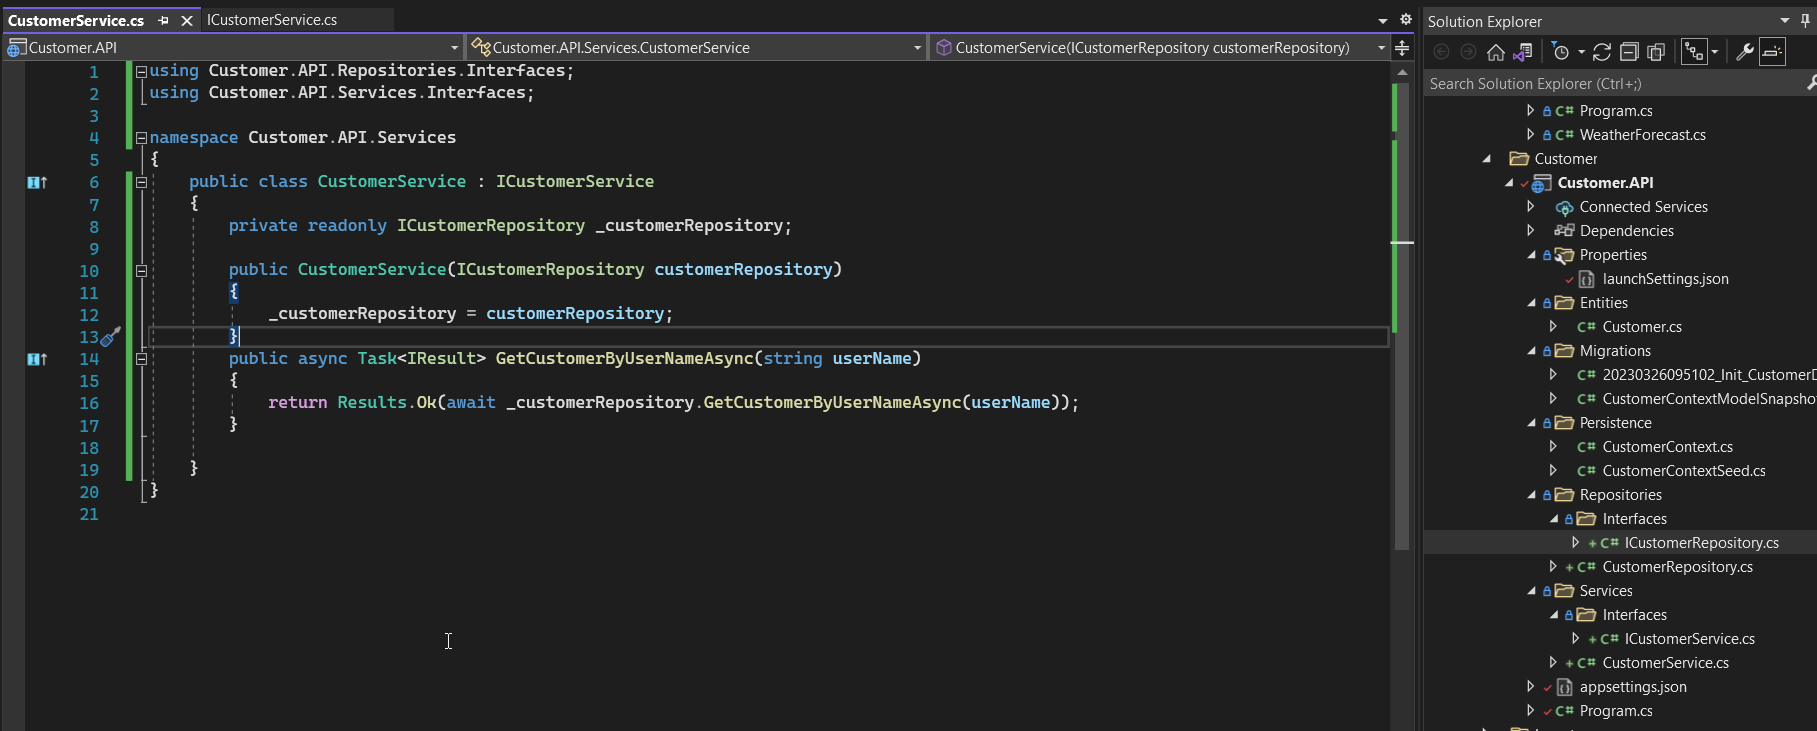
- Create the ICustomerService interface and CustomerService in the Service folder of Customer.API
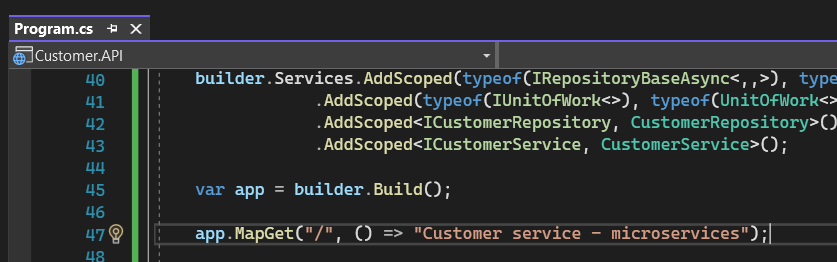
- Declare the Dependence injection in program.cs

3. Build Minimal API for Customer service
- Minimal API is a new feature introduced in .NET 6.0. It allows developers to create simpler and more user-friendly APIs using shorter code snippets and providing a new approach to web application development.
- Minimal API applications can be created using simple classes, providing simple endpoints, and are designed to optimize for developing simple web applications. Minimal API in .NET provides many ways to configure and customize your APIs, from routing options to file loader configurations.
- With Minimal API, developers can create simpler and more user-friendly web applications quickly and more easily than ever before.
- Let’s write the minimal API for customer service
app.MapGet(“/api/customers”, async(ICustomerService customerService) => await customerService.GetCustomersAsync());
app.MapGet(“/api/customers/{username}”, async (string userName, ICustomerService customerService) => await customerService.GetCustomerByUserNameAsync(userName));
- Run the 2 APIs to test the minimal API.


- Another way to write the above API.

- Next, we will write the CRUD API for customer service. Here, I will call the repository directly for a quick test. You can create a service and call it instead.
app.MapPost(“/api/customers”, async (Customer.API.Entities.Customer customer, ICustomerRepository customerRepository) =>
{
await customerRepository.CreateAsync(customer);
await customerRepository.SaveChangesAsync();
});
app.MapDelete(“/api/customers/{id}”, async (int id, ICustomerRepository customerRepository) =>
{
var customer = await customerRepository.FindByCondition(x => x.Id == id).SingleOrDefaultAsync();
if(customer == null) return Results.NotFound();
await customerRepository.DeleteAsync(customer);
await customerRepository.SaveChangesAsync();
return Results.NoContent();
});
- Use the Postman to test the Minimap API.
4. Containerize for Product.API service
- To containerize for Customer.API service, we will click on the right of Project Customer.API and select DockerSupport.
- File Docker will be created and we will adjust the content like this one:

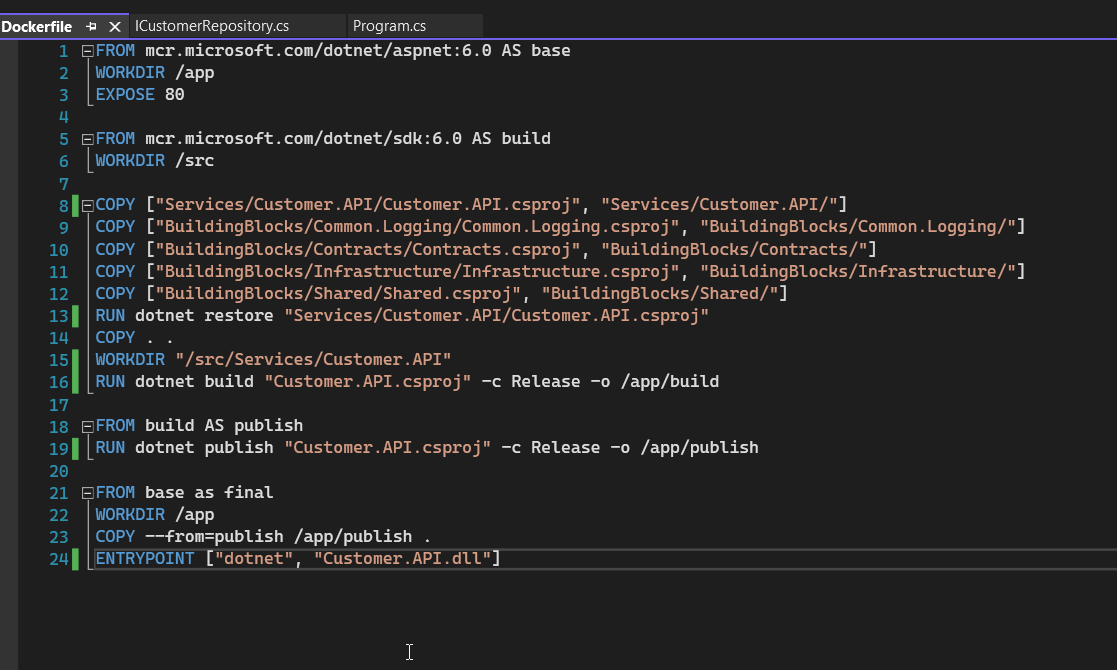
- The explanation of the content in the docker file and how to run it was covered in Part 2, so I will not repeat it here. You can review it if you do not understand the docker file and how to run it. (Build the product service part 2)
5. Summary
- So we have completed Part 3 in the Microservices practical series. We have built the project structure, set up the environment with Docker, and implemented the Customer service with Minimal API and PostgreSQL…
- Great! In part 4, we will implement the Basket service with Redis to manage the shopping cart.
- Thank you for your article. Have a great weekend!
- If anyone has any questions about the topics covered in this article, you can send an inbox message via email:long.nguyendh@saigontechnology.com. I will try my best to answer any questions within my knowledge. Thank you so much.
- All of my source code has been uploaded to GitHub, and you can download it for reference: Github
References
- Microservice architecture style – Azure
- Microservices architecture | Microsoft Learn
- The API gateway pattern versus the direct client-to-microservice communication | Microsoft Learn
- https://rabbitmq.com/
- https://kafka.apache.org/
- https://collabnix.com/portainer-in-5-minutes-using-docker-extension/
- https://docs.docker.com/desktop/install/windows-install/
- https://blog.christian-schou.dk/use-serilog-with-asp-net-core-net6/
- https://dev.mysql.com/downloads/workbench/

Web Application Development
Related articles

What You Need to Know about State Management: 6 Techniques for ASP.NET Core MVC

Unlocking the Potential of .NET MAUI for Frontend and Web Developers

Say Hello to .NET MAUI

Json Web Token Using C#?

How to build UI with .NET MAUI

Real-time ASP.NET with SignalR