Introduction
According to jwt.io:
“JSON Web Token (JWT) is an open standard (RFC 7519) that defines a compact and self-contained way for securely transmitting information between parties as a JSON object. This information can be verified and trusted because it is digitally signed.”
In a nutshell, JWT allows us to exchange data securely using cryptographic algorithms.
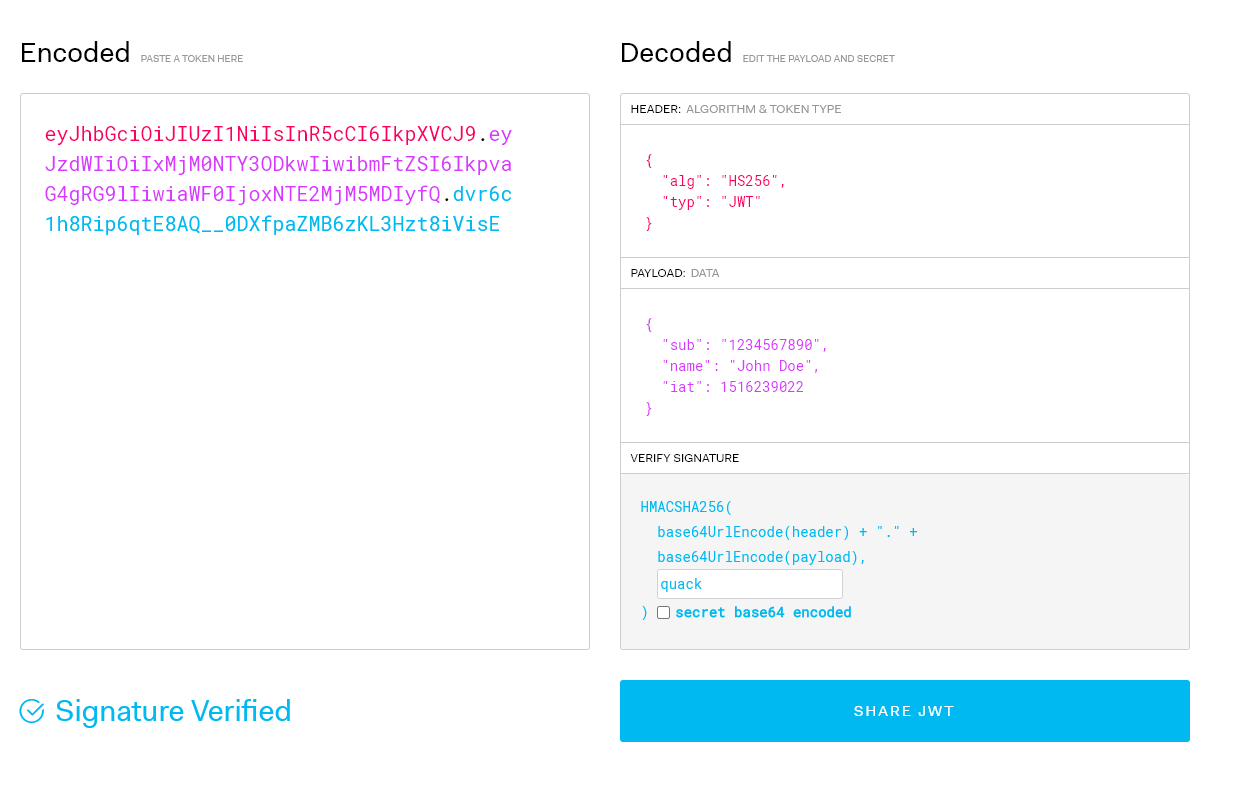
When people refer to JWT, they usually mean JWS (Json web signature) which has 3 parts separated by a dot (“.”). Although anyone can see its payload. It’s considered secure because the jwt can be verified using the signature part. We can use websites like jwt.io to debug our generated token.
Along with JWS, we could represent a JWT using JWE(Json web encryption) which also adds confidentiality to the result. With this type of encryption, only the consumer knows what is in the payload.
In this post, I will cover only the JWS generated by the HS256 algorithm and reserve JWE for another post for the sake of brevity and simplicity. So, everytime I mention JWT in this post, I’m talking about JWS and not JWE.
If you are interested, you can read more about JWE here.
Jwt structure
Jwt contains of 3 parts:
– Header
– Payload
– Signature
Header
The Header of JWT is a JSON object. This part identifies which algorithm is used to generate the signature, it usually contains 2 fields “alg” and “typ“.
For example:
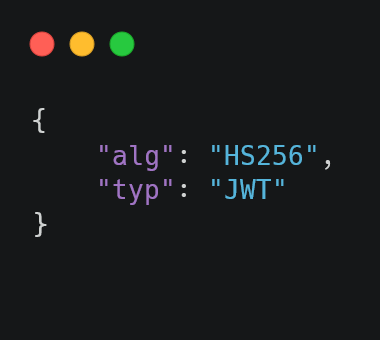
Figure 01: JWT Header example
The above example states that the Signature will be created using HS256 (HMAC with SHA-256 algorithm) using header and payload as input parameters.
– “alg” is the algorithm used to generate the signature.
– “typ” is the media content type of the JWT token. According to RFC 7519, Section 5.1 “This parameter is ignored by JWT implementations; any processing of this parameter is performed by the JWT application”.
Payload
Payload is also a JSON object containing multiple claims. We have 3 claim types:
– Registered claim names (Defined in RFC 7519).
– Public claims (Not defined in the RFC 7519 but published here).
– Private claims (Only the JWT producer and JWT consumer know what the claim stands for). For example, we can define a claim like this: “tenantId”:”tenant 123″ as a tenant id in our multi-tenant application.
Signature
We can create our signature using a symmetric or asymmetric algorithm (defined in our header). For example, if we want to use HS256 to generate our signature, the “alg” in our header should have the value “HS256”.
Create Jwt using c#
In this section, we will use HMAC-Sha256 hash function to generate the jwt.
Before diving into the code, here’s the formula of generating the JWT.
jwt = Base64Url(header).Base64Url(payload).Base64Url(signature)
Given the formula for signature as below:
Signature = HmacSha256(key, Base64Url(header).Base64Url(payload))
This formula looks a bit messy but really easy to implement. Keep following me along the post, I will try my best to explain everything.
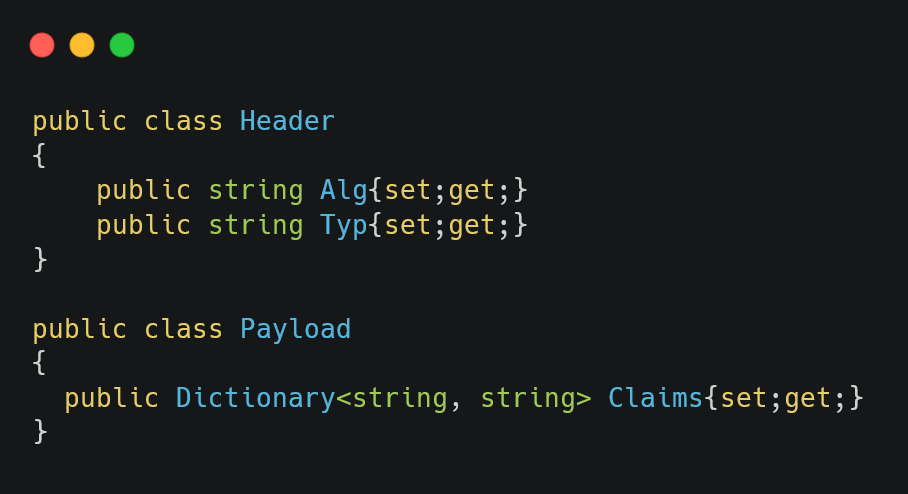
First, we will define a class for Payload and Header.
Figure 02: Define the Header and Payload
And also a method to generate JWT. This method takes the header, payload and the secret key. The ‘string’ returned encoded using Base64UrlEncode function
Figure 03: Define the method’s signature for generating the JWT.
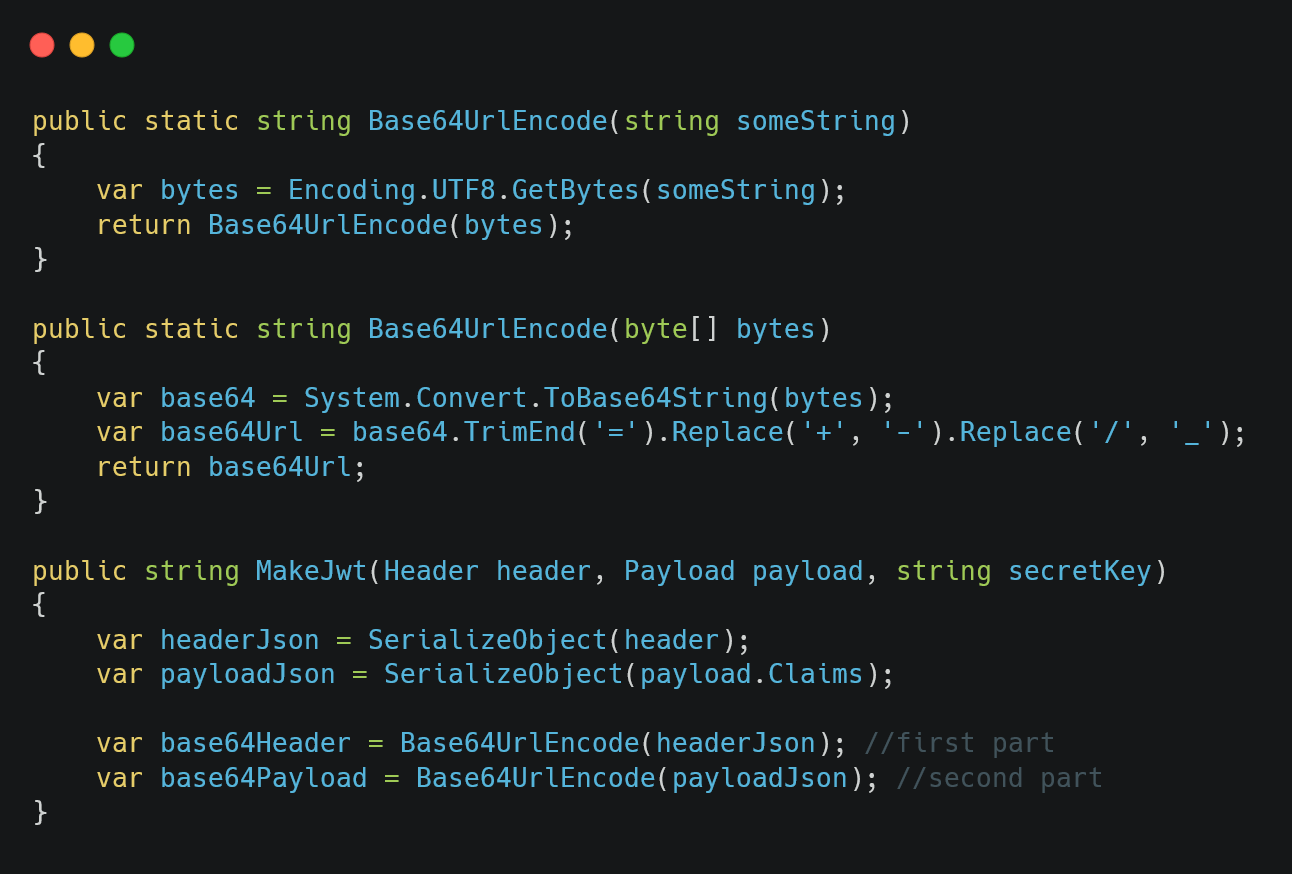
To generate the first two parts of the JWT, we only need to serialize the header and payload, then encode them using Base64Url accordingly.
Figure 04: Defining the helper methods and using them inside the MakeJwt method
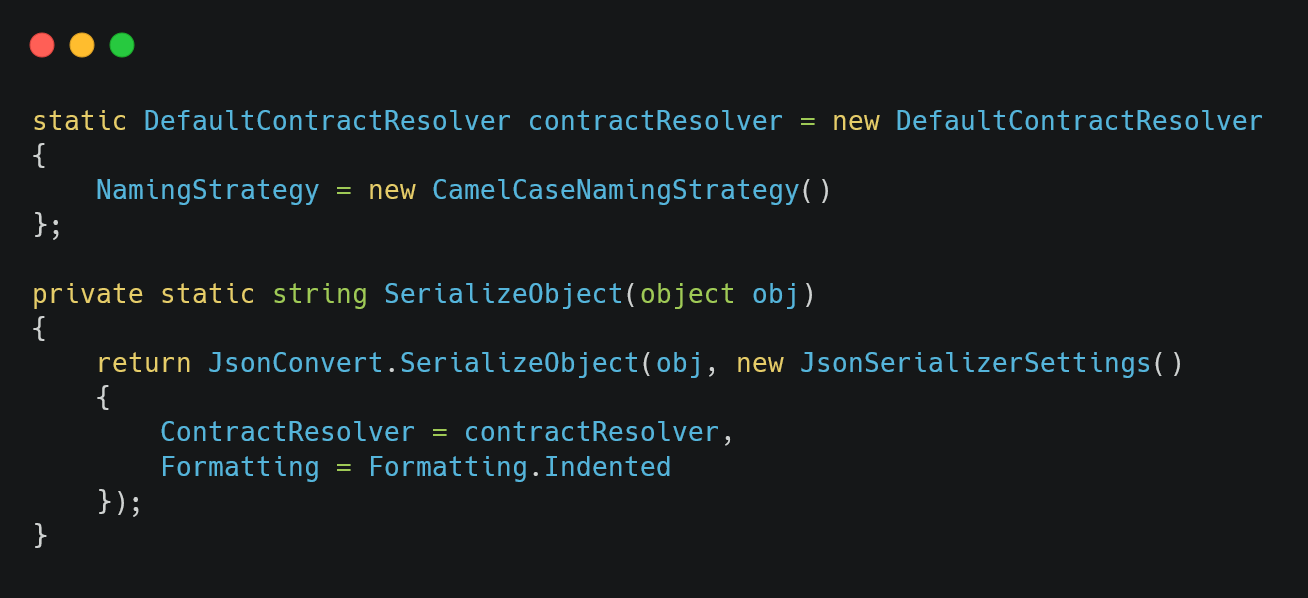
For Json serialization, we will use Newtonsoft and set the NamingStrategy to CamelCase. You can use your favorite json serialization library, but remember to set its naming strategy to CamelCase (refer to the header section above).
Figure 05: Setting json contract resolver to camel case and the SerializeObject helper method
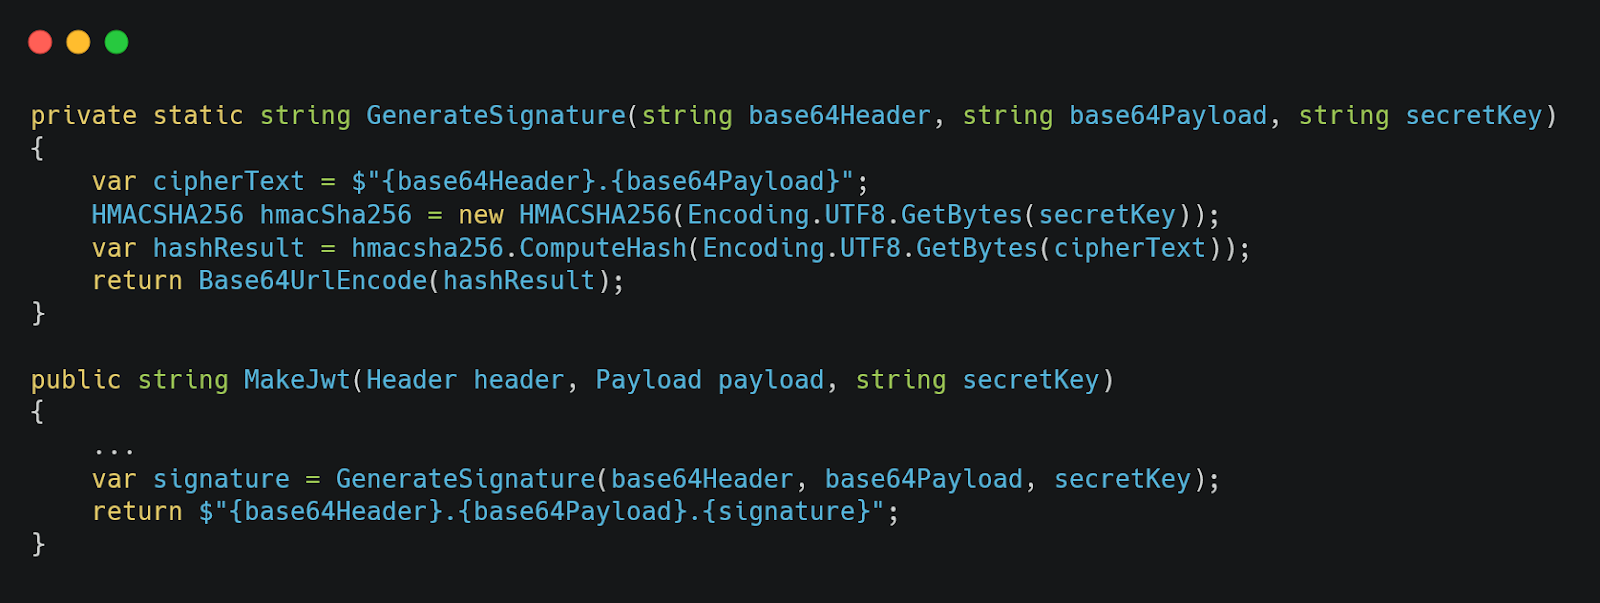
Generating the signature is a bit trickier. First, we need to create an instance of HMACSHA256 class using the secret key provided. Then we call ComputeHash on the cipher text which was constructed using the first 2 parts of our jwt. Note that the ComputeHash returns the byte[]. We need to use Base64UrlEncode on this byte array to get the string output as the third part. Finally, we do a string interpolation and return it.
Figure 06: Generating the signature & using it inside the MakeJwt method
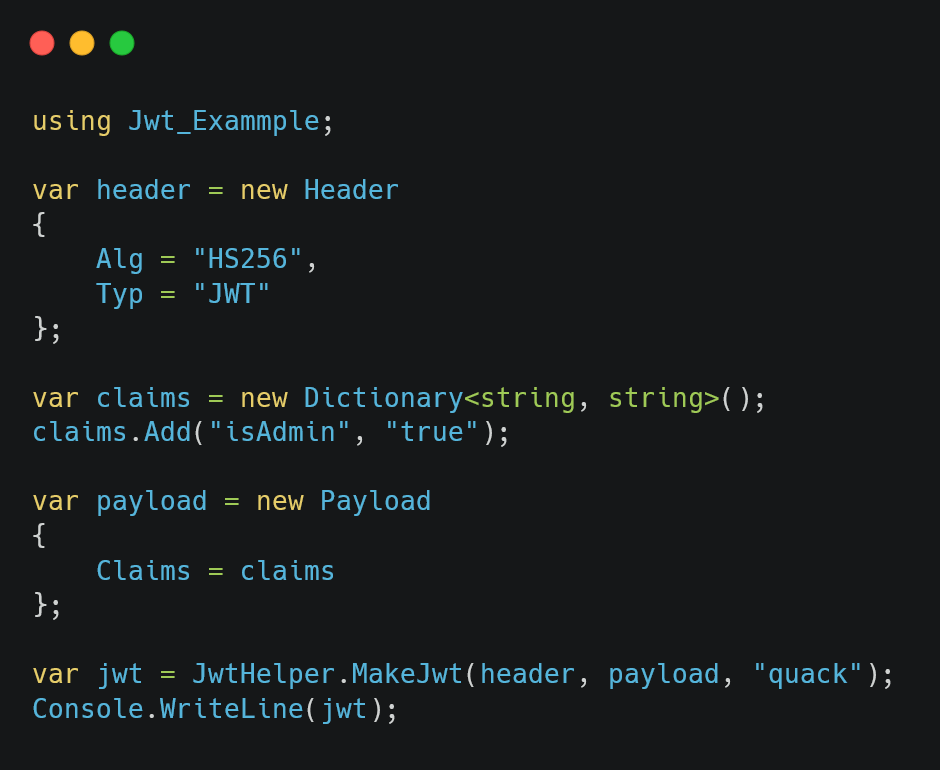
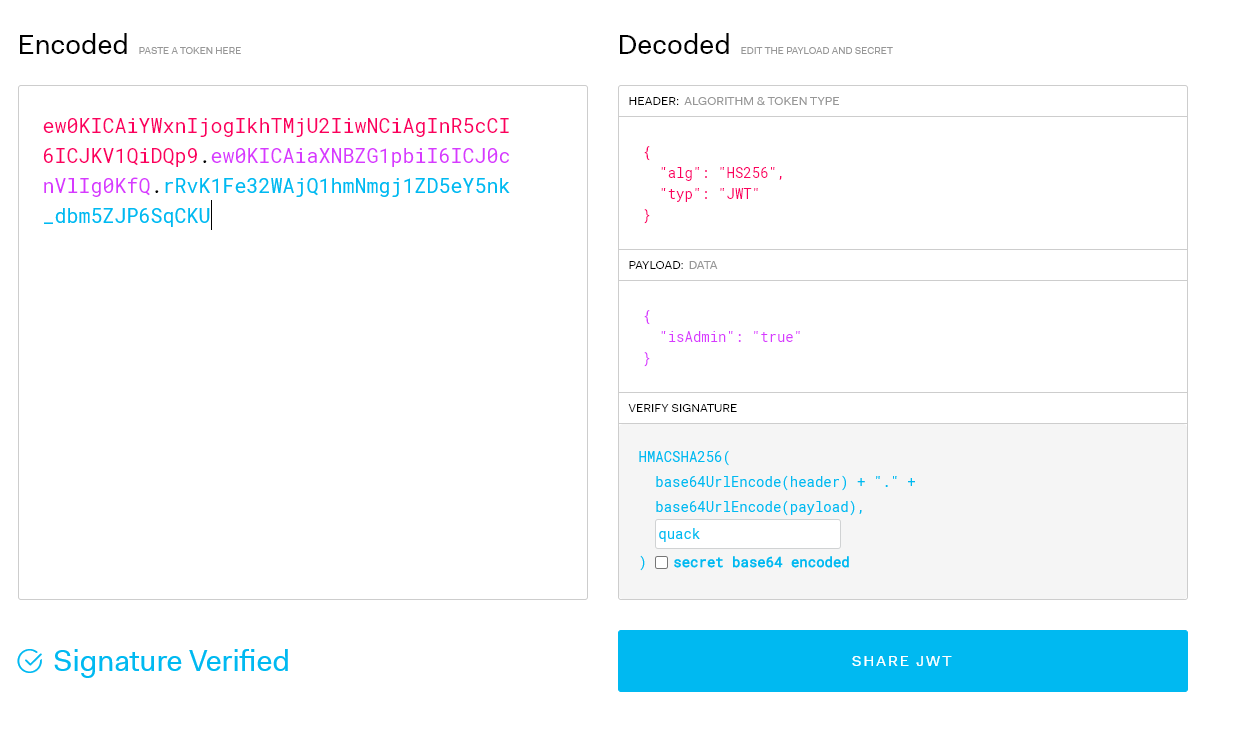
We can use jwt.io to debug our generated token. Here’s an example of using the code.
Figure 07: Generating the jwt token using our MakeJwt method
Figure 08: Verifying our generated JWT using jwt.io
Parsing and verifying Jwt using c#
Decoding and verifying Jwt is also very simple.
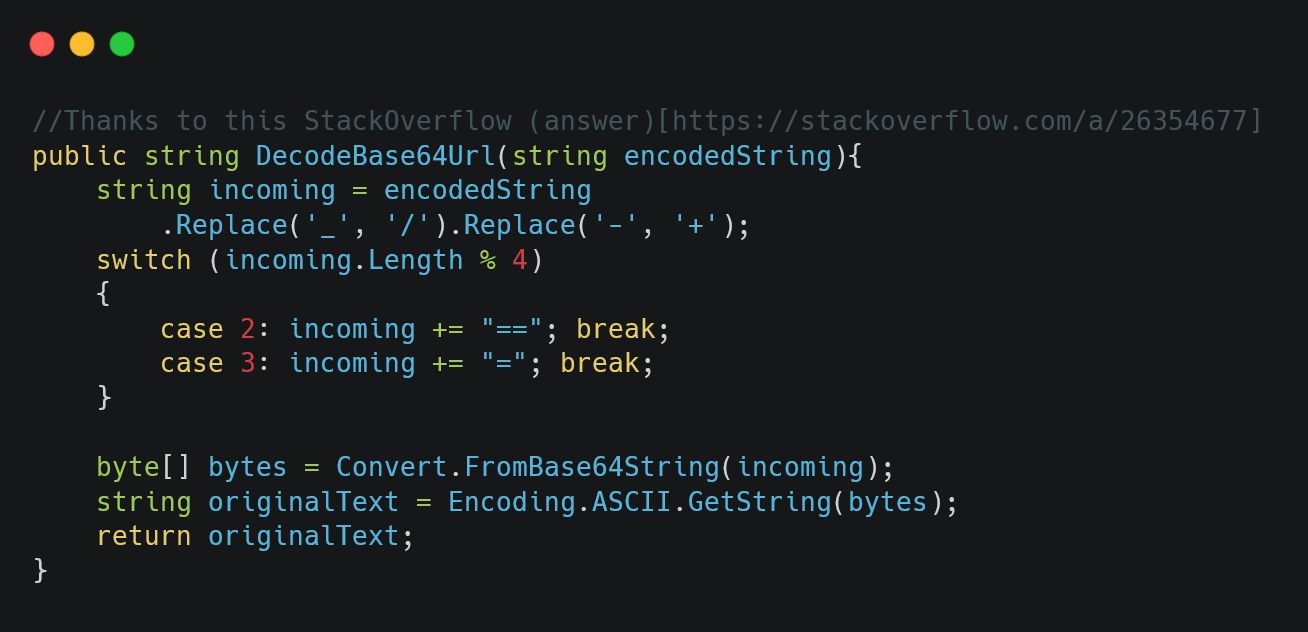
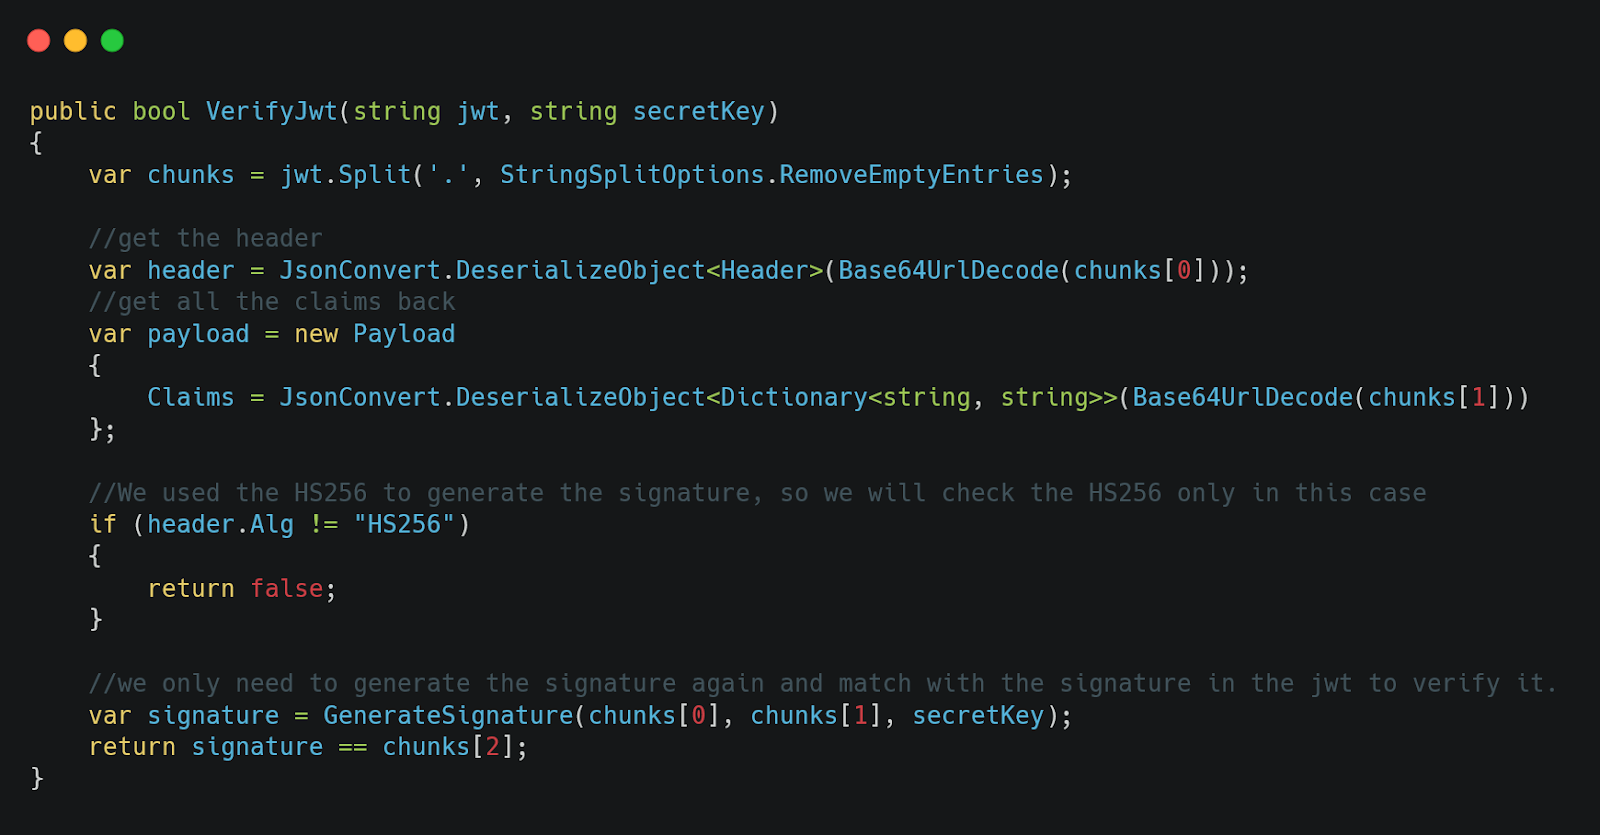
First, we split the jwt into 3 parts using ‘.’ as the separator character. The first part should be our header, the second part is the payload and the third part should be the signature respectively. We use Base64UrlDecode method to decode the string, then deserialize the first 2 parts to get the header and payload.
To verify it, we only need to generate the signature again using the formula above and compare it against the third part of the jwt. In our case, we are using the HS256 algorithm to generate the jwt so we could just hard-code this condition. For general use cases, we must verify using the provided algorithm in the header.
We can use the jwt generated by jwt.io to check our VerifyJwt method as well.
Figure 09: DecodeBase64Url helper method
Figure 10: VerifyJwt method
Figure 11: Try generating a token using jwt.io
Figure 12: Verifying the JWT using our VerifyJWT method
Conclusion
In this post, we had an insight into how JWT works, and how to implement and also verify it. Hopefully, we will have a dedicated post for JWE in the future as well.
You can find the source code here.


