What is TPL Dataflow?
TPL Dataflow (Task Parallel Library Dataflow) is a .NET Framework library designed for building robust and scalable concurrent data processing pipelines. It offers a declarative model in which you define a network of interconnected “blocks” that process and transport data, enabling efficient and flexible parallelism.
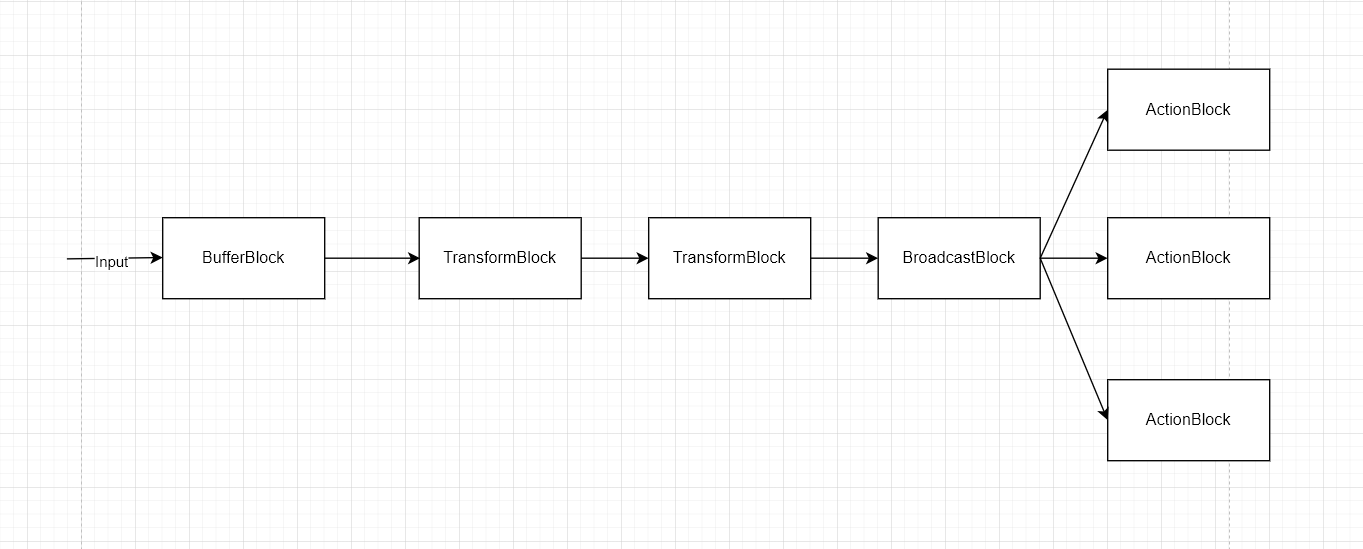
Unlike the traditional programming model, which usually requires callbacks and synchronization objects, TPL Dataflow provides building blocks that allow you to construct a pipeline-like dataflow specifying how your data should be processed and the dependencies between your data. For example, we can create an image processing pipeline that processes an image using four blocks that connect. You can think of it as in the diagram below.
Figure 1: Example diagram of a TPL Dataflow workflow
How to use TPL Dataflow
TPL Dataflow is not included by default. So, if we want to use it, we will have to install the NuGet package named System.Threading.Tasks.Dataflow. In .NET Core and later versions, we can use the dotnet CLI to install it using the command dotnet add package System.Threading.Tasks.Dataflow or by using the NuGet Package Manager.
1. Source block
As I have mentioned in the previous section, TPL Dataflow contains building blocks. If a block produces data, then we call it a source block. A block that receives data is called a target block.
However, this distinction is only a relative concept because a block could send data (as a source block) to one block and receive data (as a target block) from another block. In this section, we will take a glance at the source block.
It’s defined by the interface ISourceBlock, in which TOutput is the type of output that the source produces. Microsoft has some predefined blocks that inherit from this interface. For example: BufferBlock, BroadcastBlock, TransformBlock, TransformManyBlock… However, you can also create your block by creating a new class and implementing this interface. Here’s the structure of the ISourceBlock:
Figure 2: Structure of the ISourceBlock interface
2. Target block
A target block receives data from another block and performs work based on that data. Similar to a source block, a target block is defined by the interface ITargetBlock, in which TInput is the type of data it receives.
If a class inherits from both ISourceBlock and ITargetBlock, we should inherit it from the IPropagatorBlock instead. This interface inherits from both the aforementioned interfaces and is usually used to express the intention of receiving and producing data. Here’s the structure of the ITargetBlock.
Figure 3: Structure of the ITargetBlock interface
And the structure of IPropagatorBlock:
Figure 4: Structure of the IPropagatorBlock which simply inherits from ISourceBlock and ITargetBlock
Receive/Send data to blocks
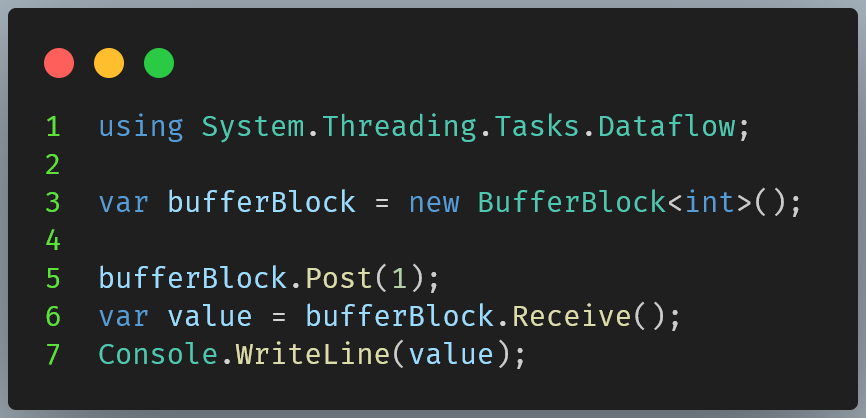
TPL Dataflow provides methods so that we can send/receive data synchronously or asynchronously. To send/receive messages synchronously, we can use the methods Post and Receive, respectively.
Figure 5: Example of sending and receiving a message in a TPL Dataflow block.
The above code would output 1 on the console screen.
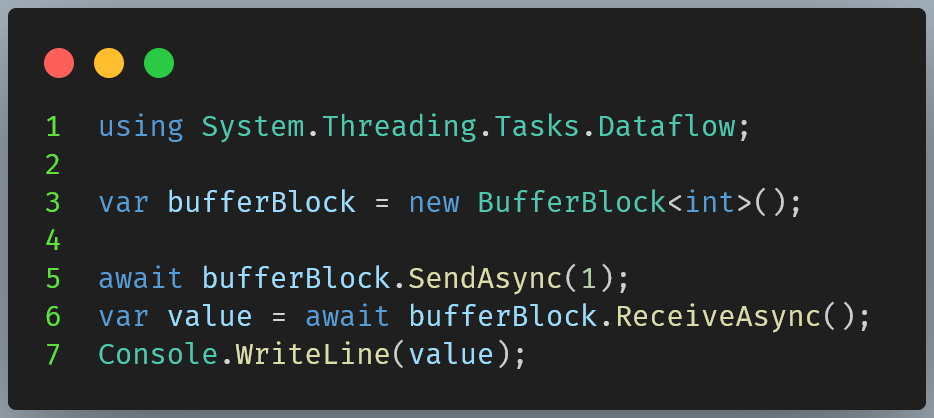
Similarly, we can use the SendAsync and ReceiveAsync to send and receive data to the block asynchronously.
Figure 6: Example of sending and receiving a message in a TPL Dataflow block asynchronously.
Predefined blocks
In this section, I will introduce you to some predefined blocks that Microsoft has crafted for us. These blocks are general-purpose and usually take delegates as parameters so that we can define the underlying behavior.
1. Buffering block
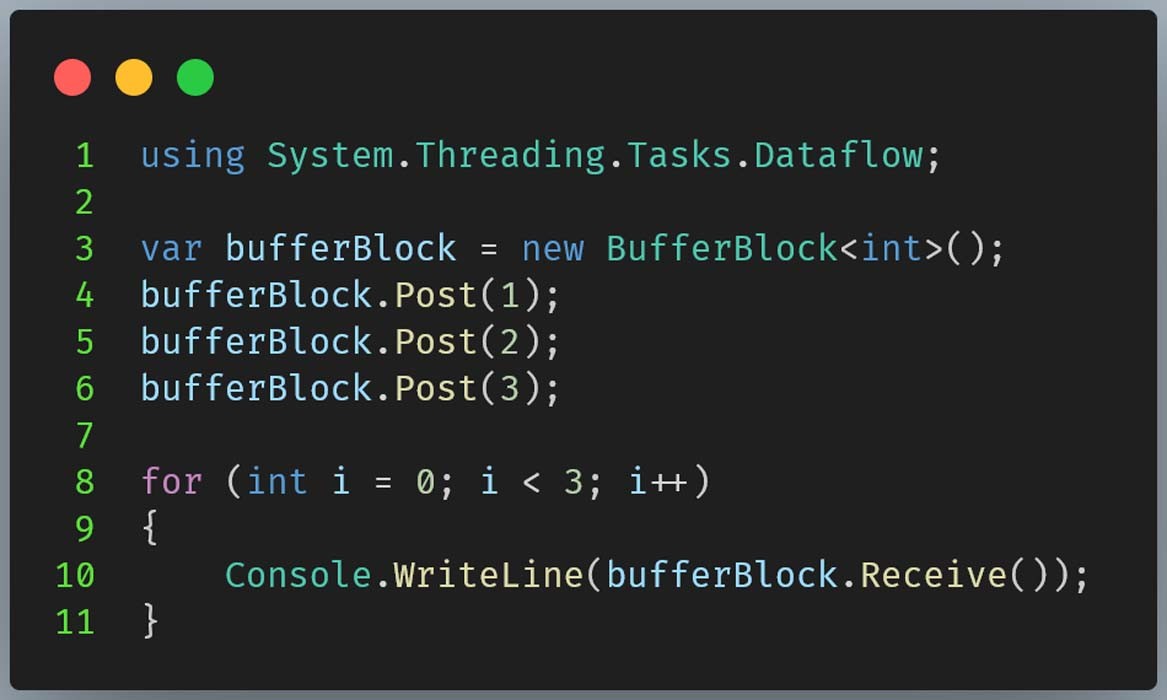
The buffering block BufferBlock is a general-purpose block that acts as a queue data structure, storing data in a FIFO (first in, first out) manner. It could be written by multiple blocks and read by multiple blocks as well. However, an individual message only gets delivered to one block.
Figure 7: Example of using BufferBlock
The above code would output 1,2,3 respectively.
2. Action block
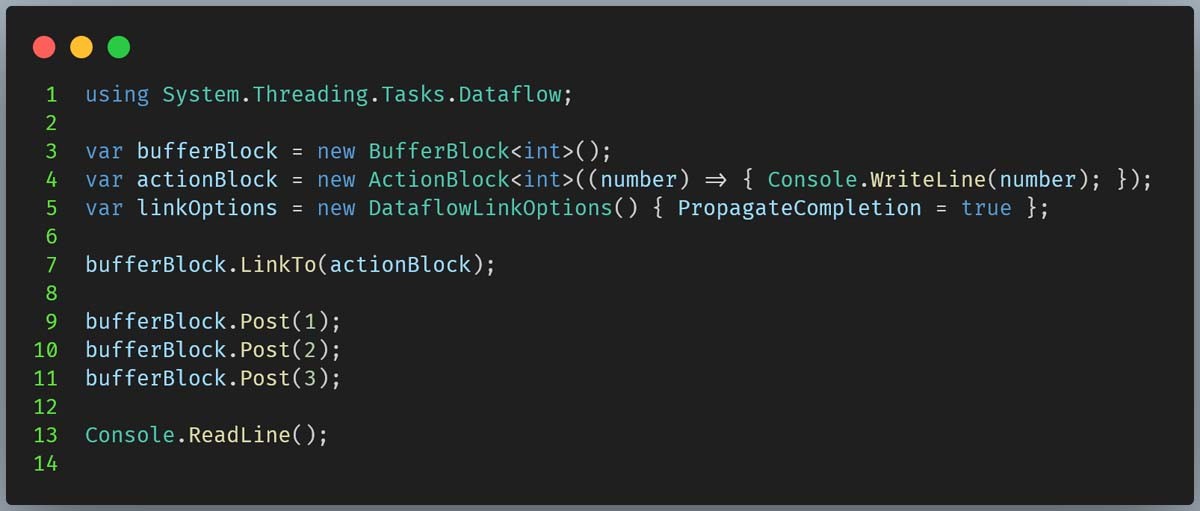
An ActionBlock is a target block that performs a predefined action upon receiving a message. For example, printing to the console, sending an email or writing to a file.
Figure 8: Example of using an ActionBlock
In this example, we create a buffer block that receives messages and sends them to the action block. Note that we create an action block and pass an Action into its constructor to define the behavior. The action block prints 1, 2, and 3, respectively.
3. Transform block
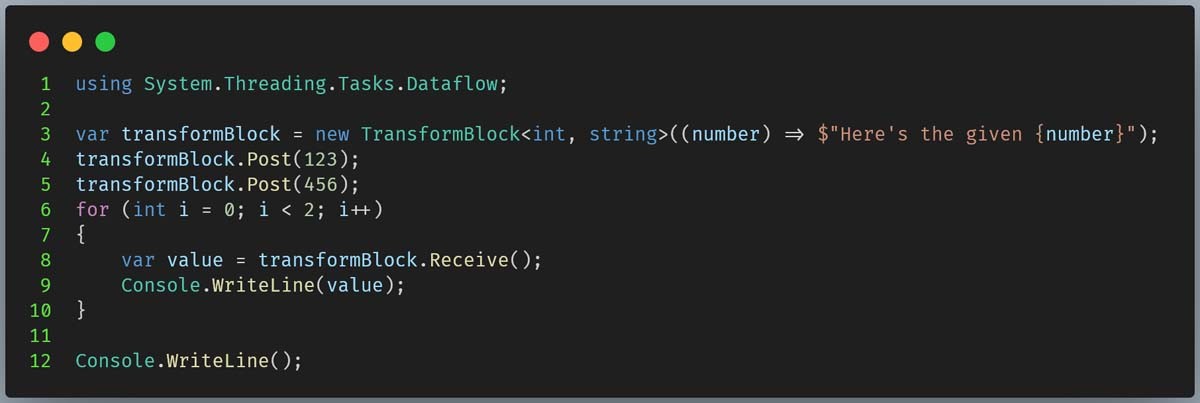
A TransformBlock is a block that takes an input and produces some output depending solely on the given data. In other words, it could be considered the map() operator of a block.
Figure 9: Example of using TransformBlock
The above example creates a transform block that takes an integer and produces a string with the format ‘Here’s the given number {}’. In this example, I made it simple and compact by using the synchronous version of the TransformBlock. However, we can also produce the output using asynchronous operations instead.
Example use case and implementations
In this section, we will piece everything from the previous section together to get a bigger picture of how it is used in the real world. This involves implementing a simple use case that makes everything clear.
The use case is that we are writing code for a weathering system that receives a message containing a date as the payload. Upon retrieving the message, our system reacts by responding with the average temperature of the day it received to multiple media channels (Facebook, Telegram, Twitter).
First, we will define the BufferBlock to handle all the messages that arrive
Figure 10: Defining the buffer block to store incoming messages.
Then, we define the next block that takes the data from the first block and performs a query based on the provided date.
Figure 11: Create a TransformBlock that returns the database on the provided input
We will need another transform block to map the list of temperatures on a date to the average temperature. This piece of logic could be put together with the previous block. However, separating them would give us better control of individual logic, so I put it into another transform block instead.
Figure 12: Creating another TransformBlock that takes a collection of temperatures and returns the average temperature
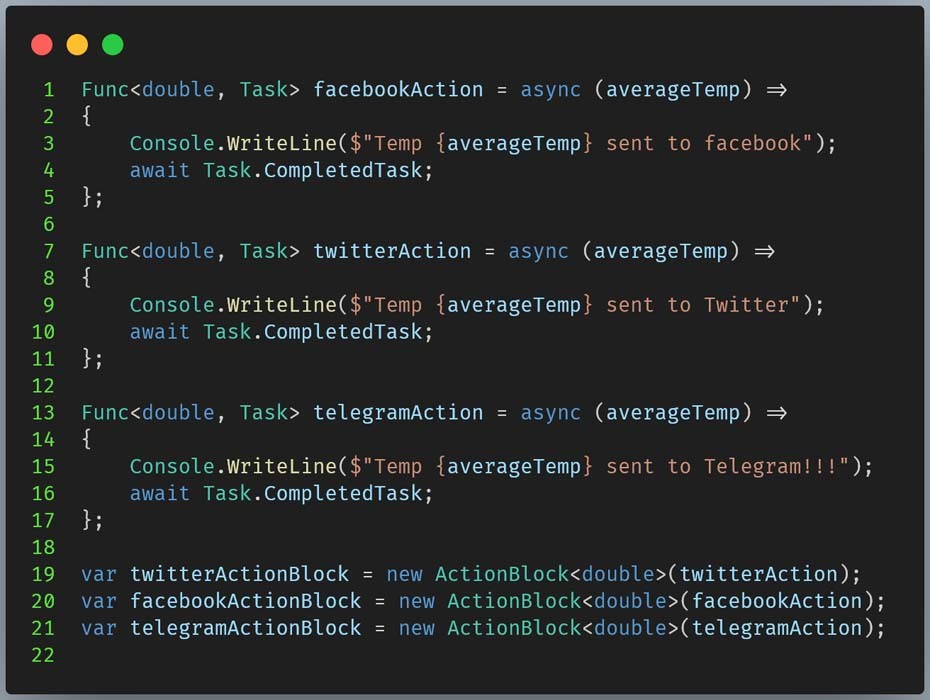
Figure 13: Creating 3 ActionBlock that simulate sending messages to a media channel
Now, if you recall that we need to send to all three channels at the same time, we will have to define some mechanism that can do that. Luckily, we have the predefined BroadcastBlock that can handle this. We will first define a broadcast block and link it to the three blocks that we defined in the previous sections.
Figure 14: Defining a broadcast block
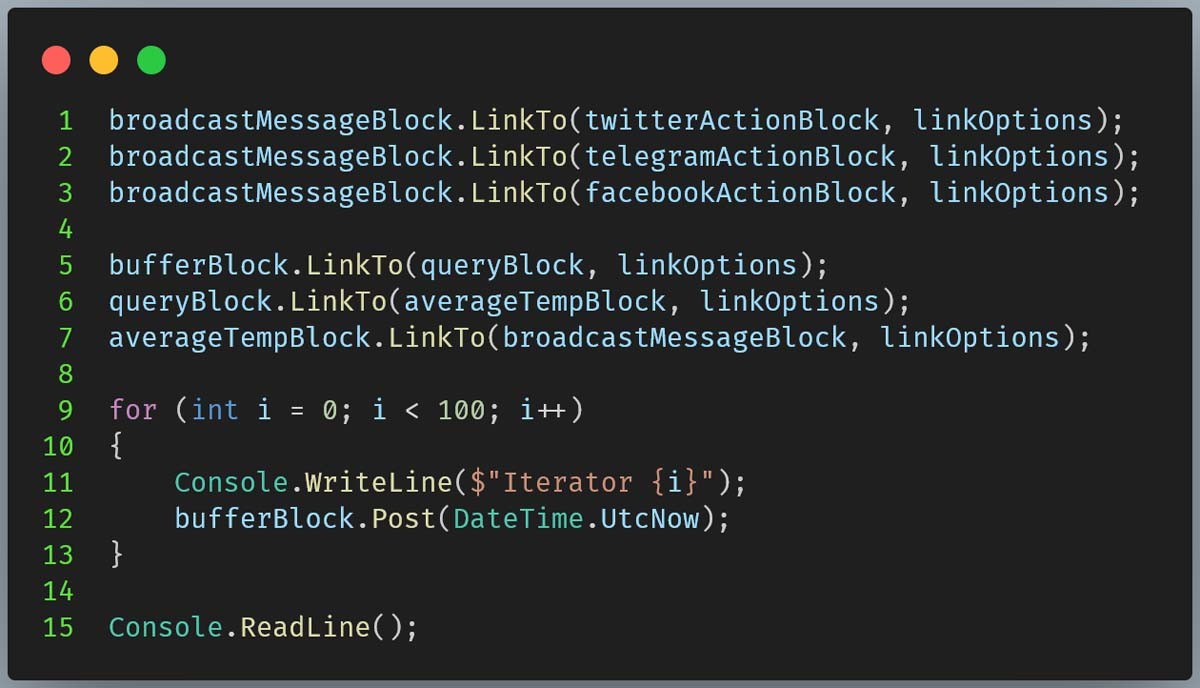
We’ve got everything we need, now it’s time to link everything together and run our application.
Figure 15: Link all the blocks and run the application
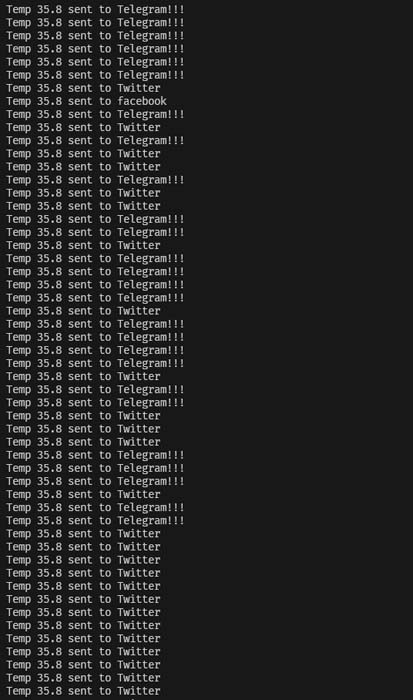
You should see the results printed out on the console. Because each block executes its action asynchronously and separately from each other, we don’t guarantee that the console prints out the messages in the order that they arrive. However, the behavior of the program remains correct
Figure 16: The result is printed on the console after running the application
Conclusion
Just like everything else, TPL also has its pros and cons. We have seen the cons in our journey; however, I would like to reiterate them here.
Pros:
– It makes our code cleaner than the imperative way of synchronization, giving us more control over each process.
– It’s suitable for pipeline-like processing where we can split our process into smaller individual processes that could work independently from each other.
– Dataflow works in a message-passing manner in which one block passes messages to another block. The work of each block is performed in its context (thread) that could be controlled via ParallelismDegree, making the management of threads easier so we could focus better on our business.
– It gives you Reactive programming to some degree where you can react to events.
Cons:
– It gives you less control over the underlying synchronization. As I mentioned in previous sections when working with TPL Dataflow, you don’t have to deal with all kinds of synchronization; however, it works on top of synchronization underneath. This gives us better focus on our business but less control over threading and tasks.
– Even though it’s suitable for parallel processing and you can control the degree of parallelism, if you use it the wrong way, it could result in performance loss.
The source code used in this post can be found here.


